Built a Pedalboard

I started to play the guitar with the Ogresse Nevimbumbao band around summer 2024. It turned out it required a couple of effects and I was really not into those things. The only effects I used were integrated to my amp (a Vox AC15 that has a reverb and a tremolo).
The effects#
I like the Analog Man King of Tone because, like the Vox, this is a piece of hardware that has some character. I mostly knew it through Marc Ribot. I also like how Mary Halvorson make a very creative use of the Line6 delay pedal, coupled to an expression pedal.
Since I was not feeling like spending thousands of euros in all those devices and that I don’t deserve them as I am an amateur guitarist, I decided to go the multi-effects way and get a Line6 HX Stomp. It has a simulation of the King of Tone and plenty of reverbs and choruses, as well as delays like the Roland Space Echo.
I have not been convinced by the amps simulations, so I continued to use the Vox as before. The Vox AC15 does not have an effect loop, so I just use the main input.
Which effects#
How do I use the Stomp#
Stomp mode, just effect toggles.
Expression#
I plugged the HX Stomp with a SP1-L6H expression pedal from Mission Engineering because I wanted something solid and heavy, and needed an extension due to the very limited interaction with the Stomp. SP1-L6H comes with an extra footswitch, that I use to switch between two effects: most of the time, it deals with the distortion gain, and when switched it controls a delay time.
SP1-L6H configuration#
Although it’s supposed to be plugged-and-play, there are a couple of tricks that were really nightmarish. First you need a stereo TRS to dual pins mono cable, which is a serious cost. Second the Stomp configuration should be like that.
Actition universal MIDI controller#
I got limited by the Stomp 3 switch buttons anyway so I decided to buy an extra MIDI controller with 4 switches from Actition.
How to program the Actition controller#
Screenshots
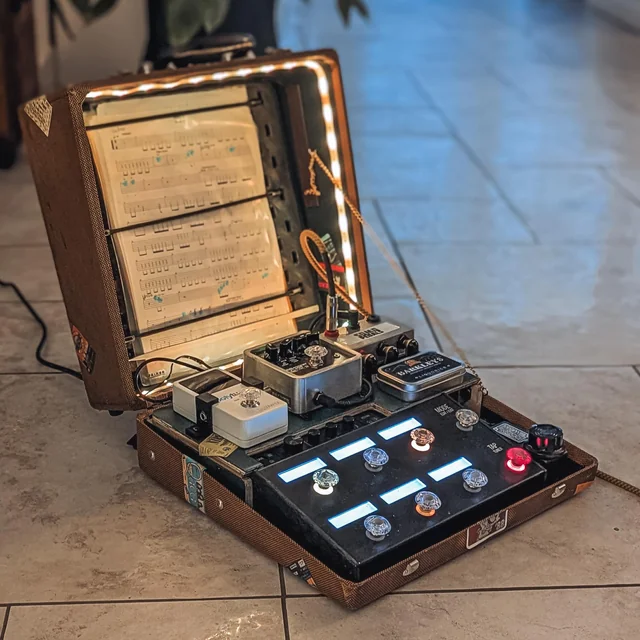
The pedalboard#
Why not continuing to stuff everything in a backpack?#
After a couple of months, I started to get really tired plugging all that mess at
every rehearsal, and obviously, the connections could suffer of all the
movements, althought the Line6 Stomp seems to be solid. I started to take a look
at r/pedalboards and got immediately disgusted by the non-diy aspect of this
and all the ready-made out of prices kits. I stayed on the subreddit until I
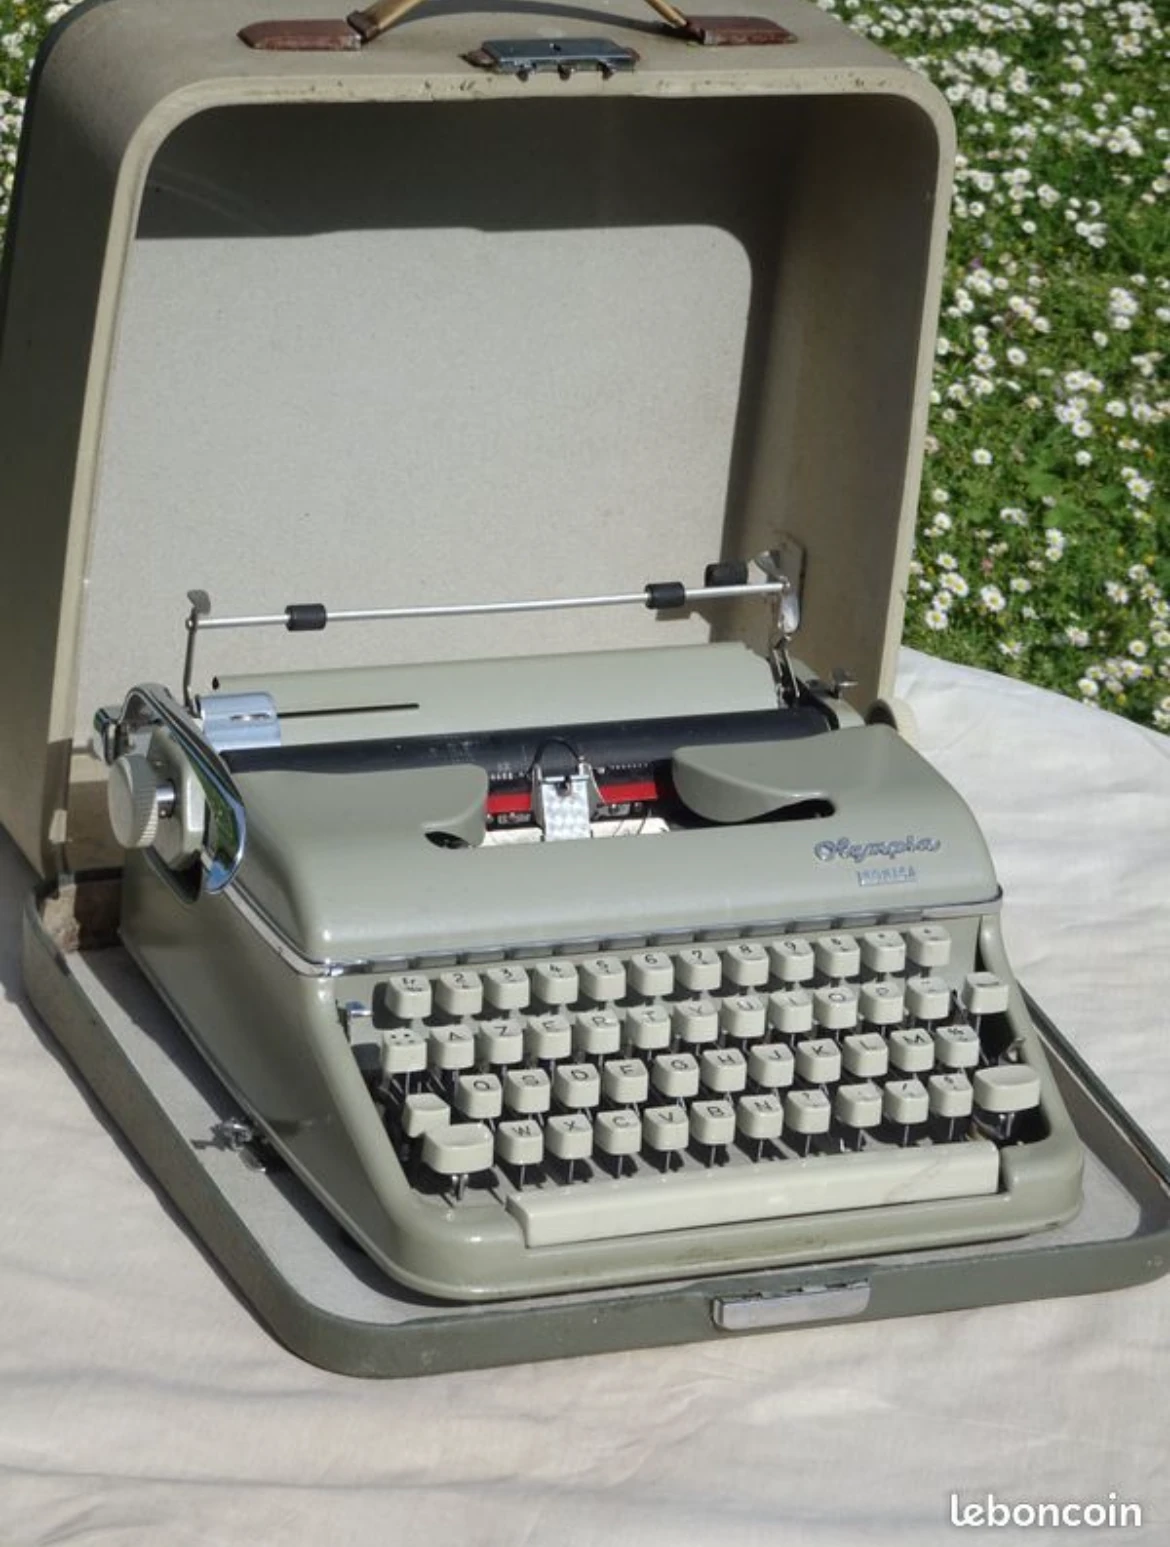
found the excellent creation of
u/HP_Lifecraft made with a
typewriter
case.
It really gave me the wish to start a similar DIY project with some cases I’d like, as I disliked most of the pedalboards solutions I seen, or their prices were prohibitive. I started to look for typewriters cases, but it turned out it was incredibly difficult to find one that was sold separatelly from it’s actual typewriter. I really did not want to get more junk at home so I forgot about it although the aesthetic was interesting.
Searching for the right case#
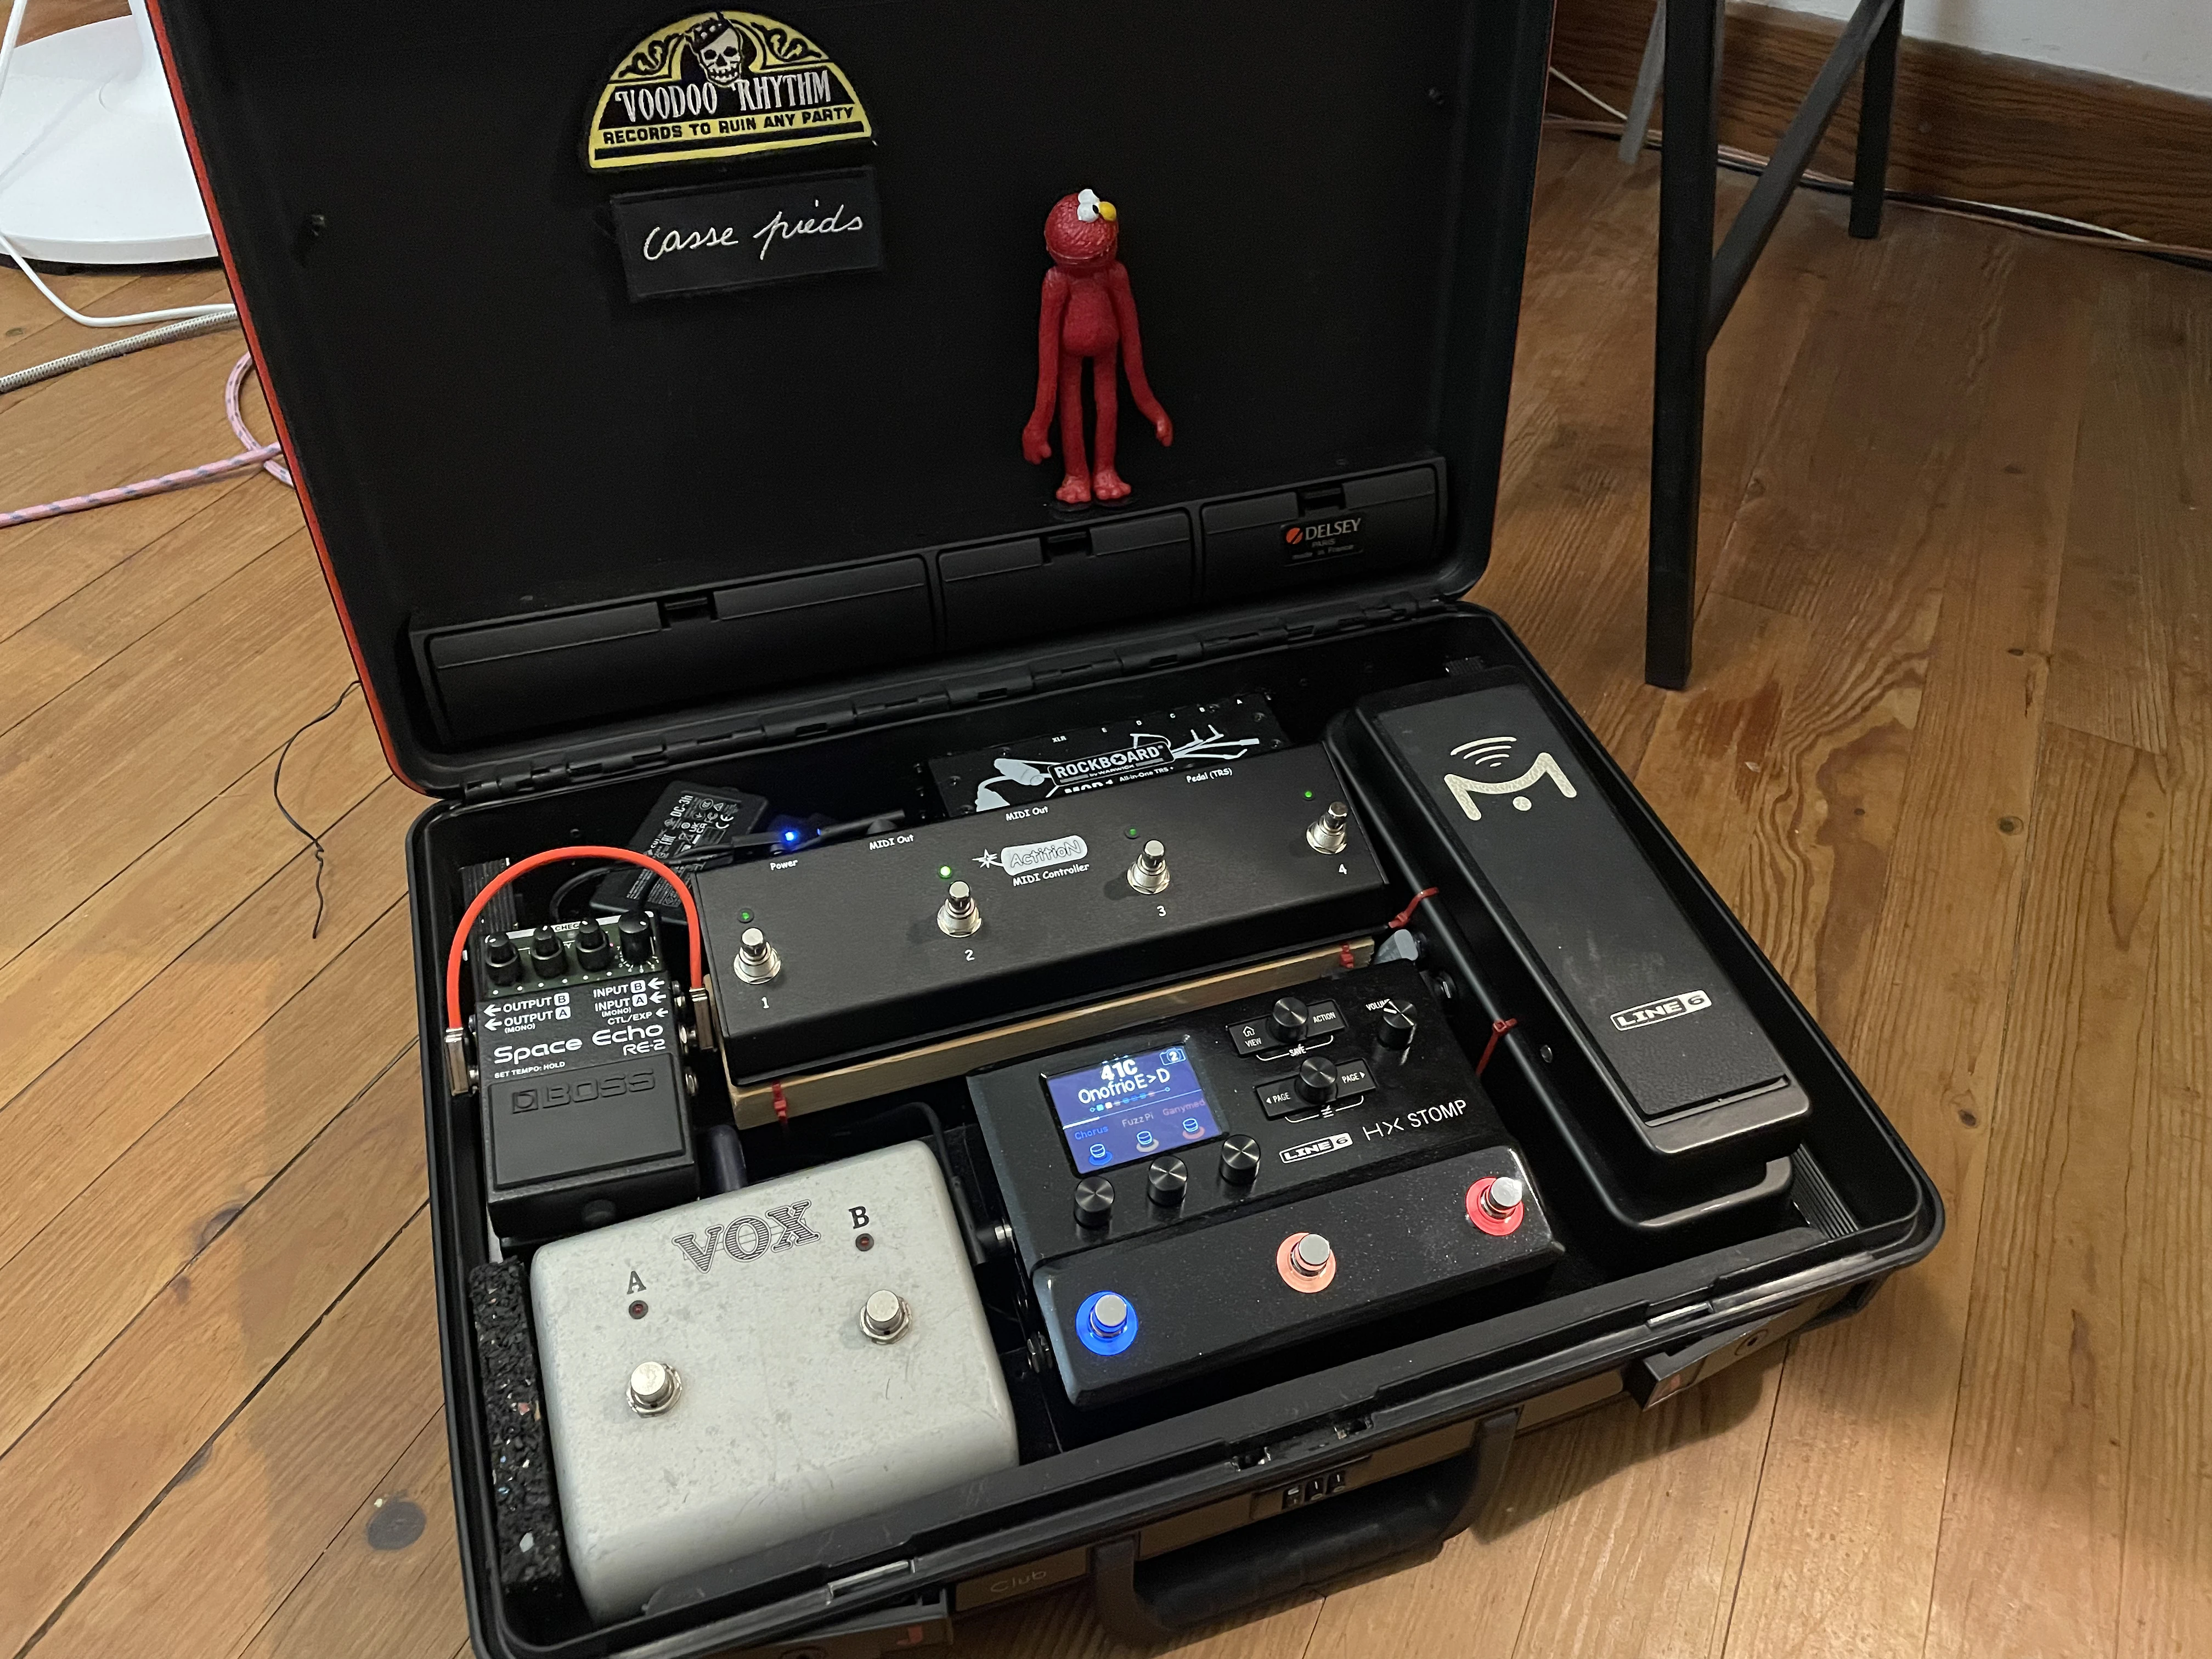
I considered many solutions: Gator pedalboards cases, beauty cases, first aid boxes, gun cases. I finally started to get interested in attaché cases as some had an aesthetic I like (similar to a ThinkPad). They are quite out of fashion so the prices were reasonnable. I looked at some Samsonite, but finally found a Delsey one, a french luggage brand that some people would use to go at the office in the eighties.
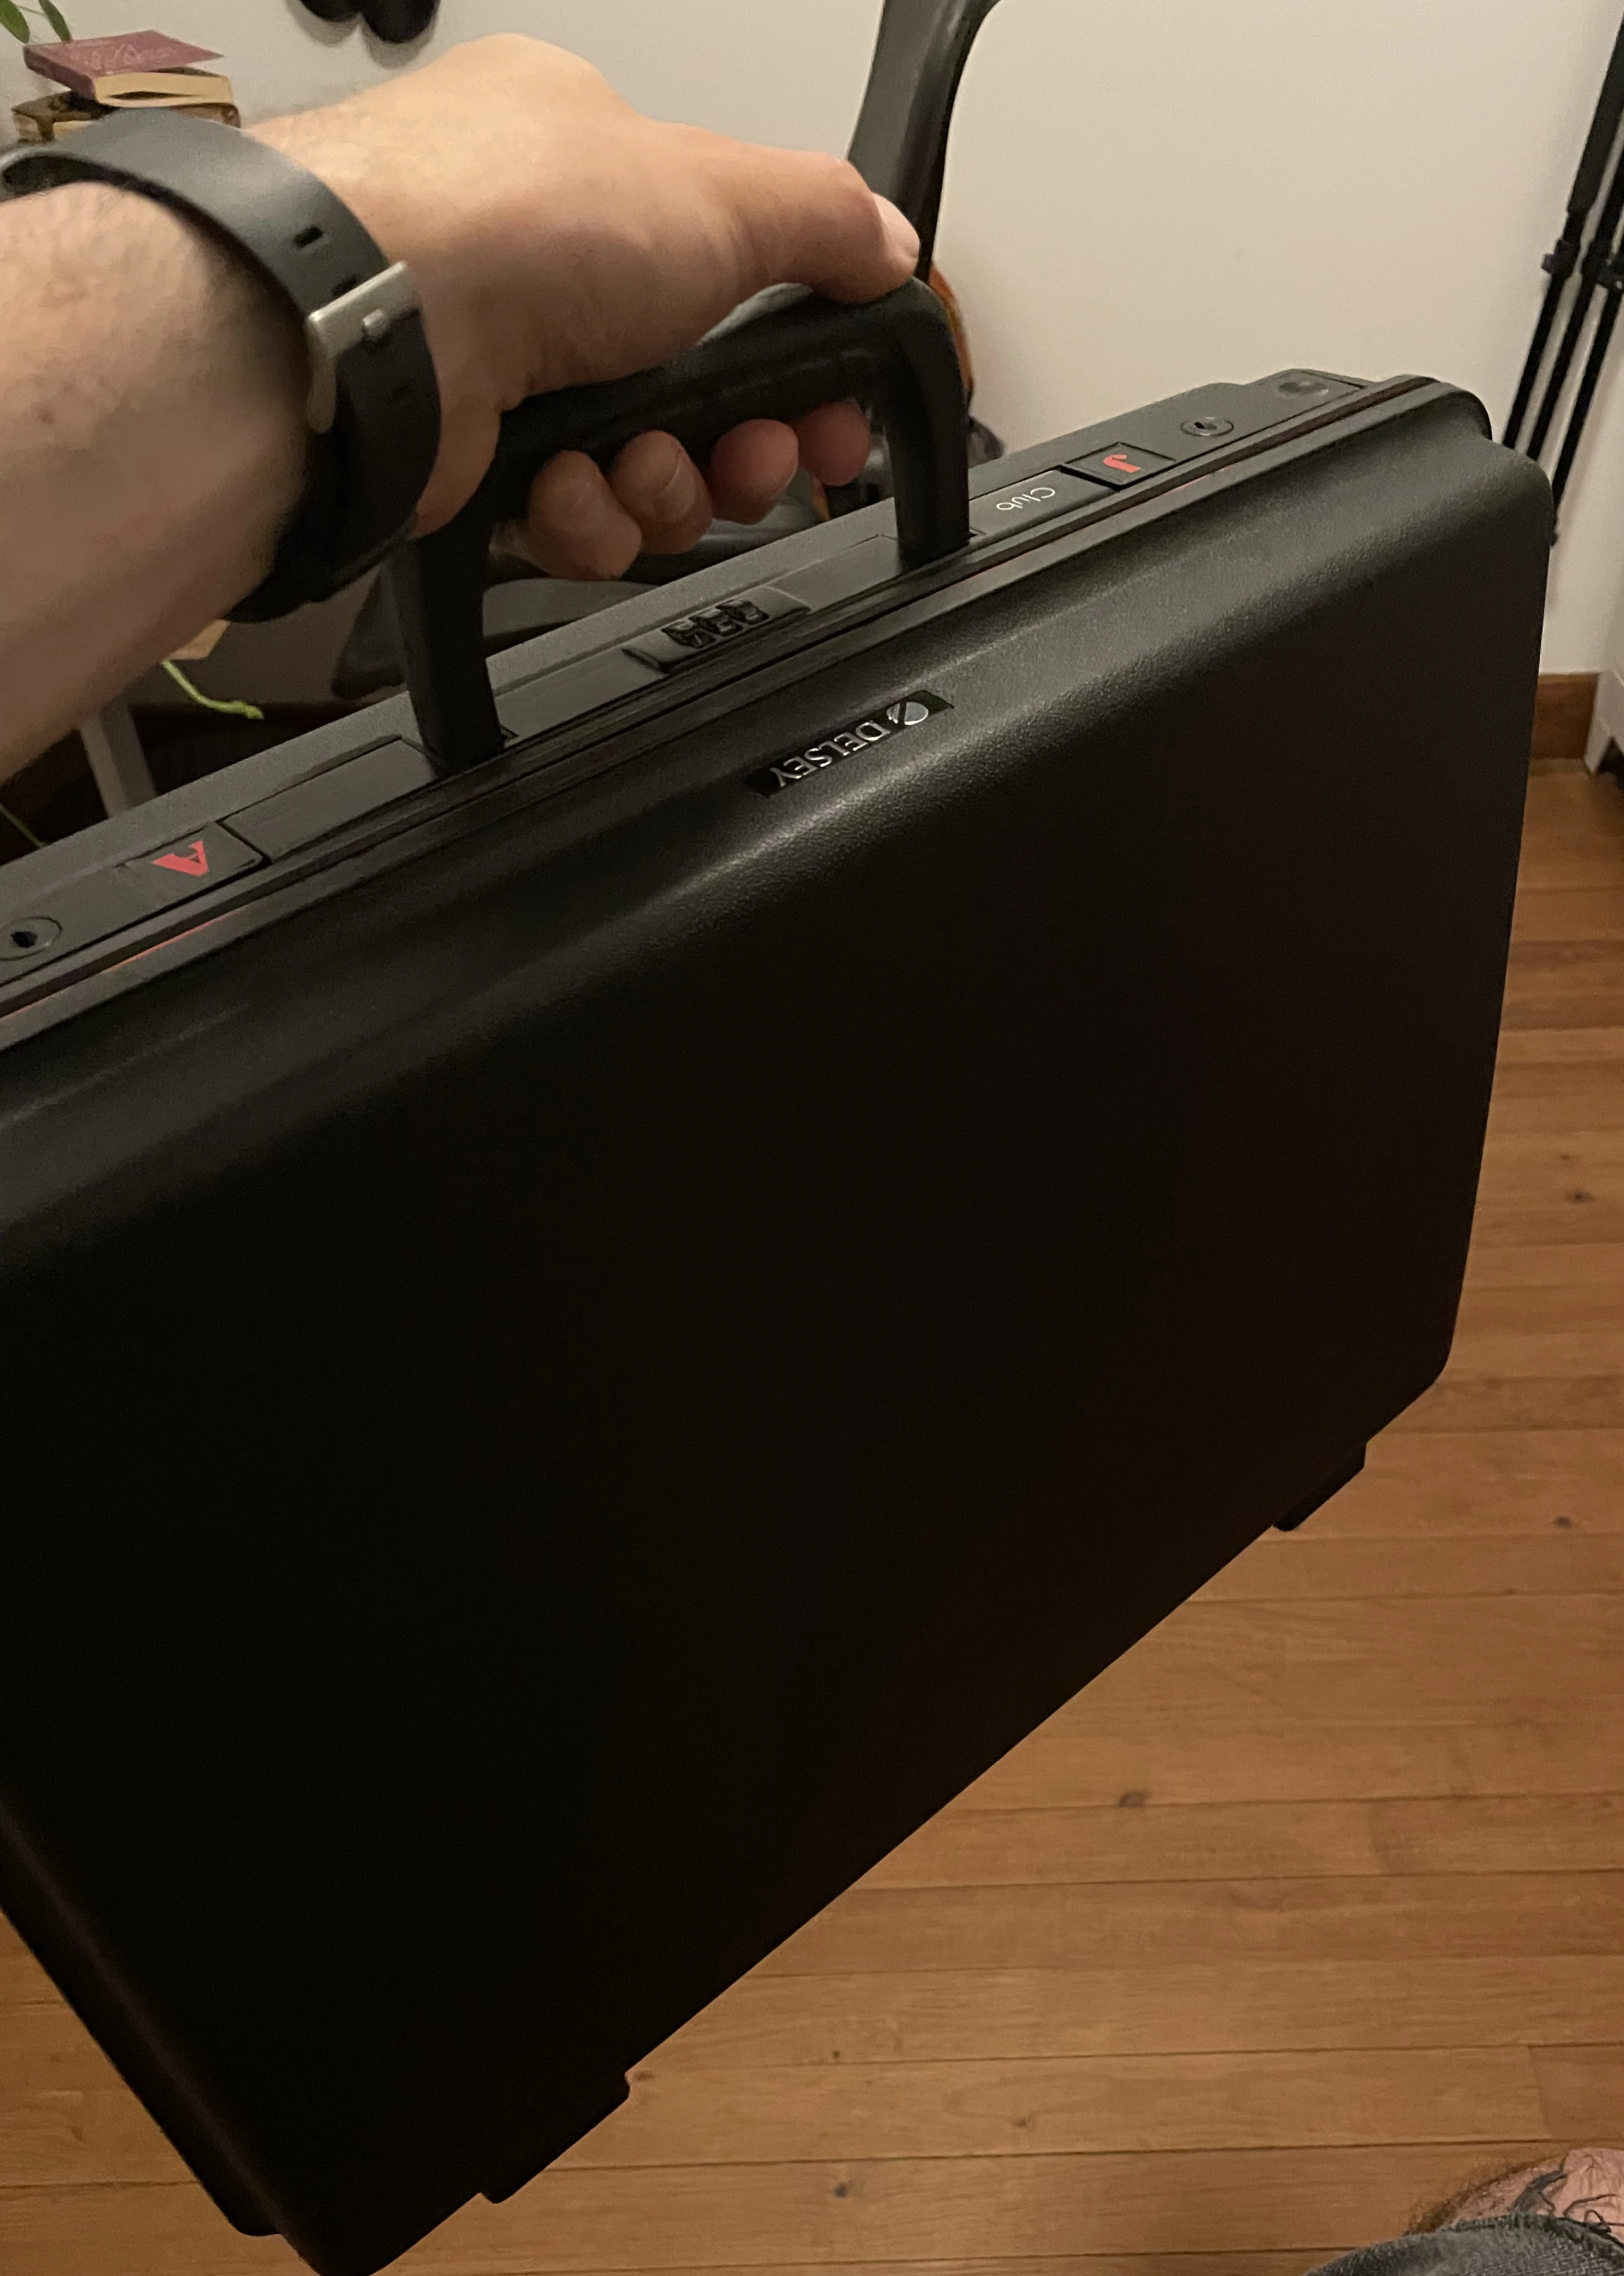
Definitely what some people in a punk rock band would not use!
Connectivity#
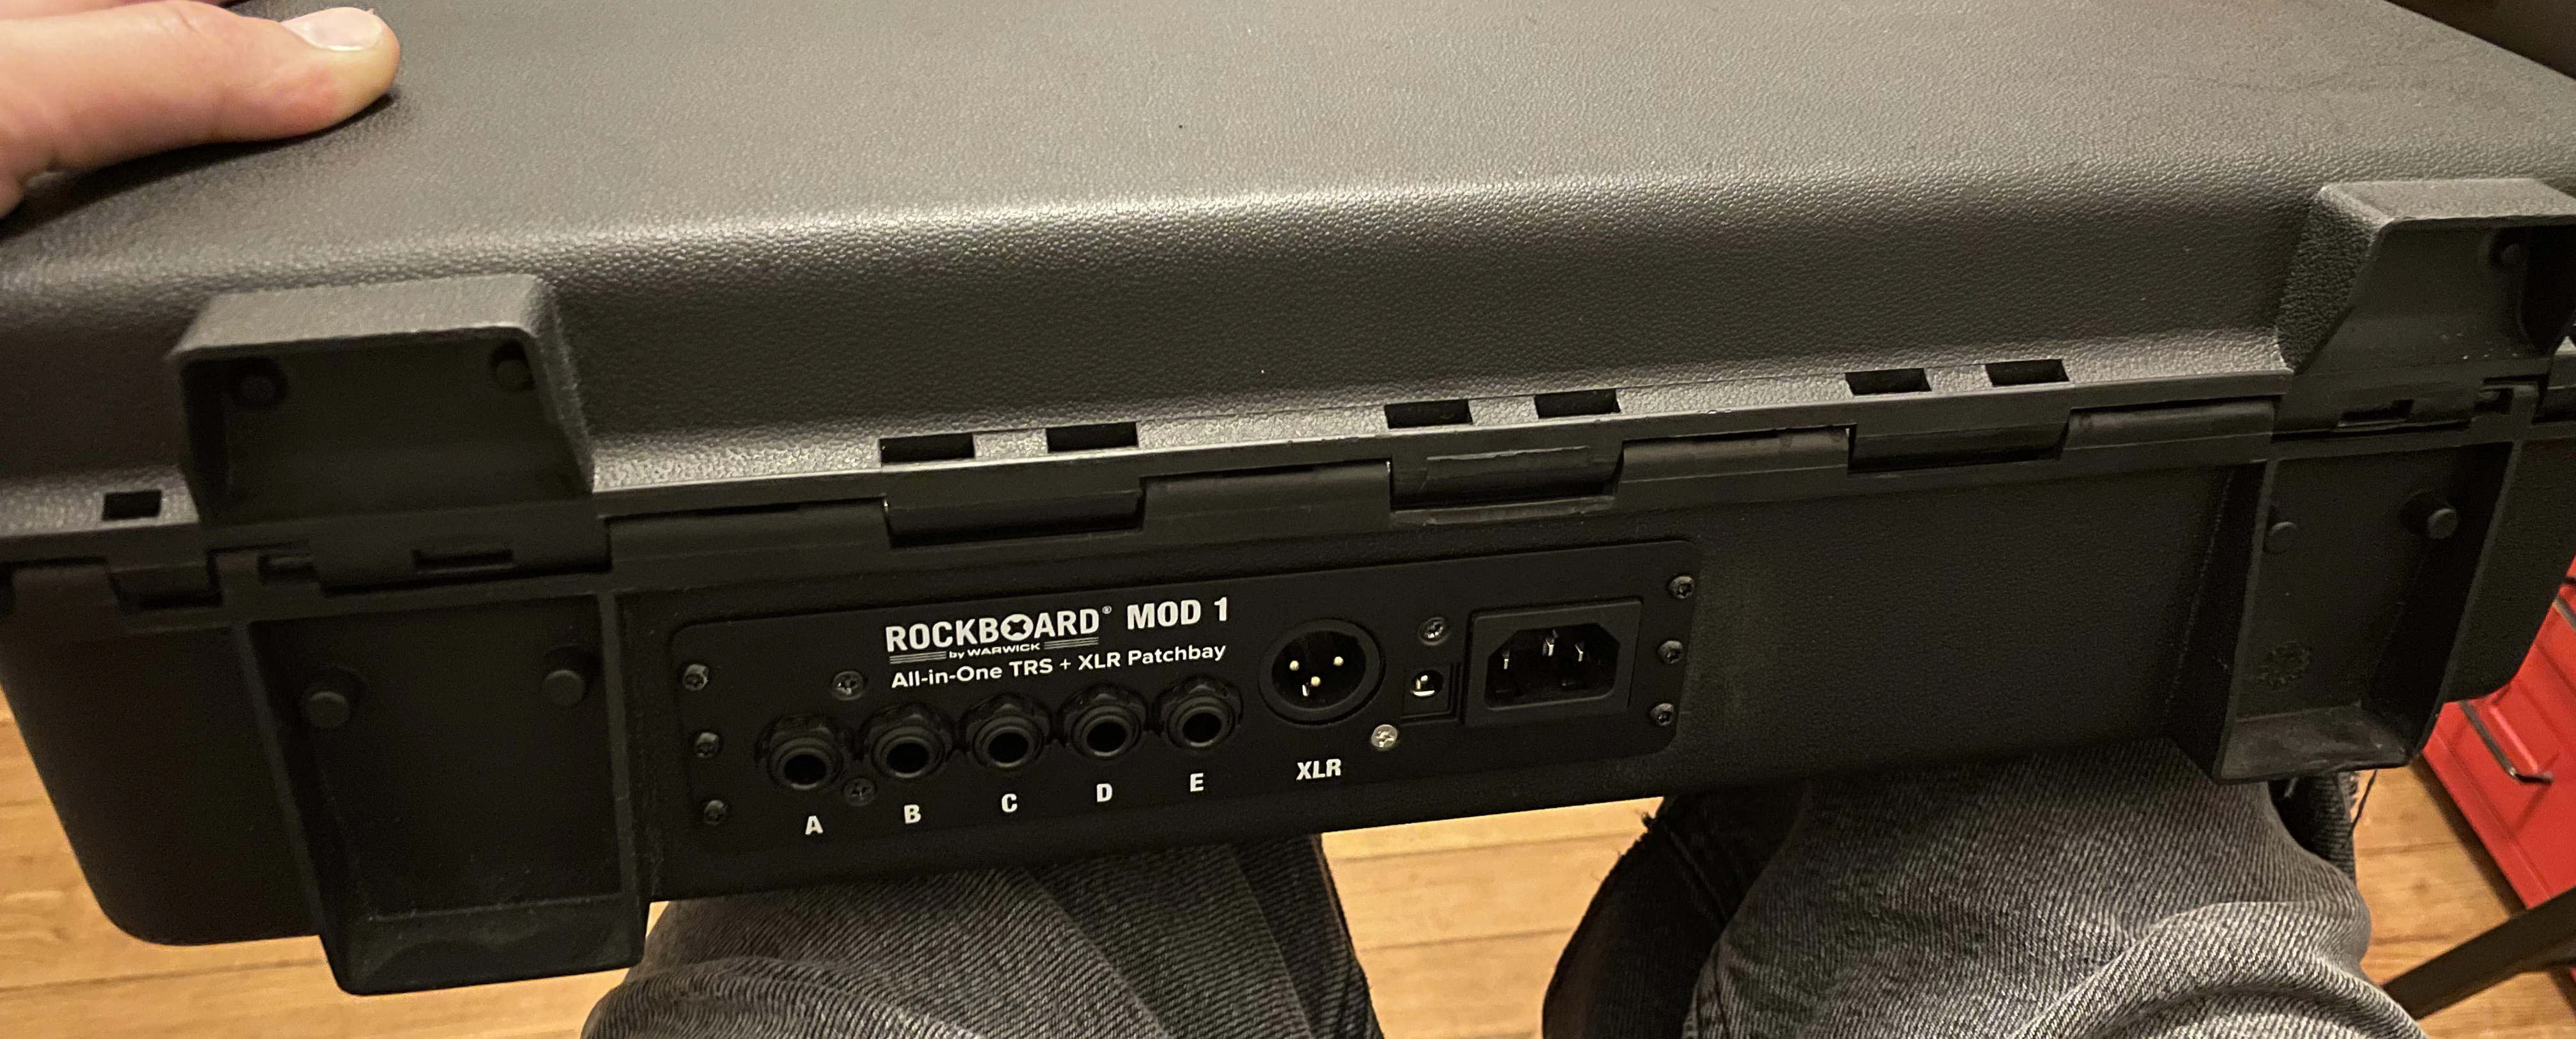
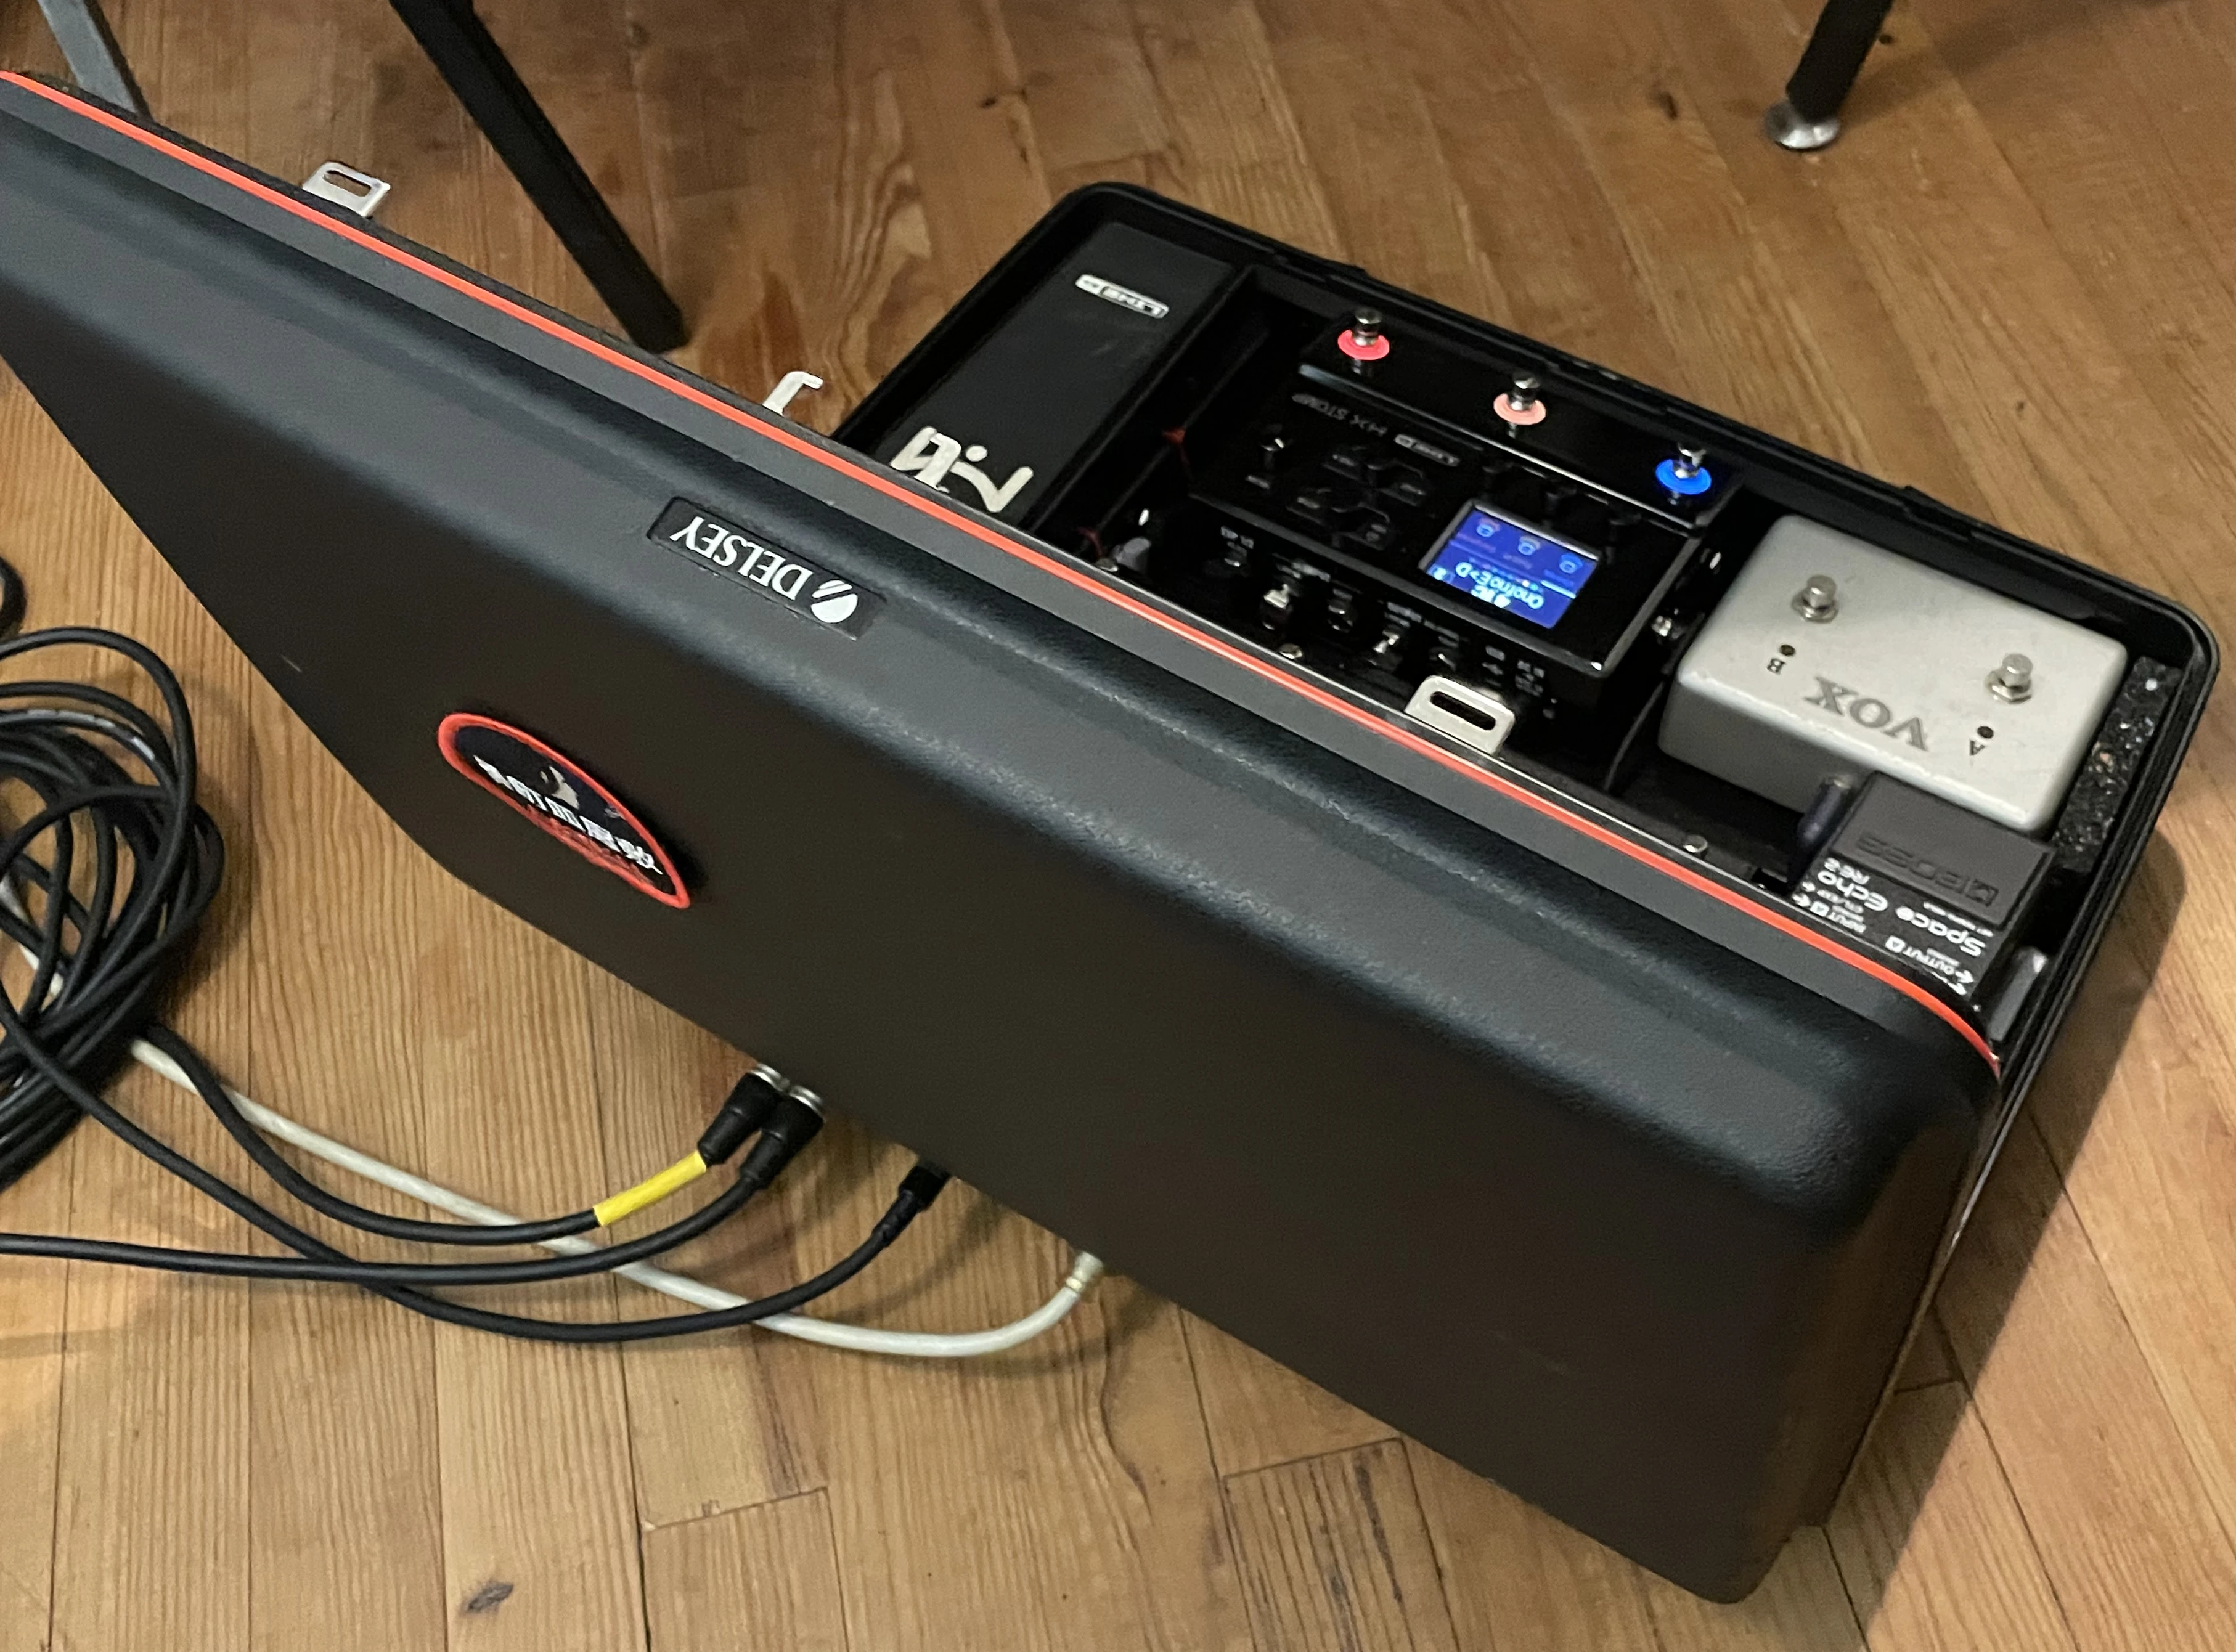
An important part is the ease of plugging. I especially liked the typewriter case DC in solution and also liked the easy access for the guitar jack input and the output to the amp. I also needed a two pin cable to pilot the effects of my amp. A perfect solution that I found for that has been the Rockboard MOD 1V2 patchbay, providing 5 TRS thru, plus AC IEC thru. All that in a rackable way. I tried to design a side hole for it, but it would have prevent the case to close. I decided to set it in the back, where the integrated foots of the case are. I dug a couple of holes with a drill and then used a metal saw to open a large hole.

Setting in in the back has been a smart move since this part was the second largest after the power strip and adapters block. From the exterior, the foot offered a fairly serious protection.
Pedalboard structure#
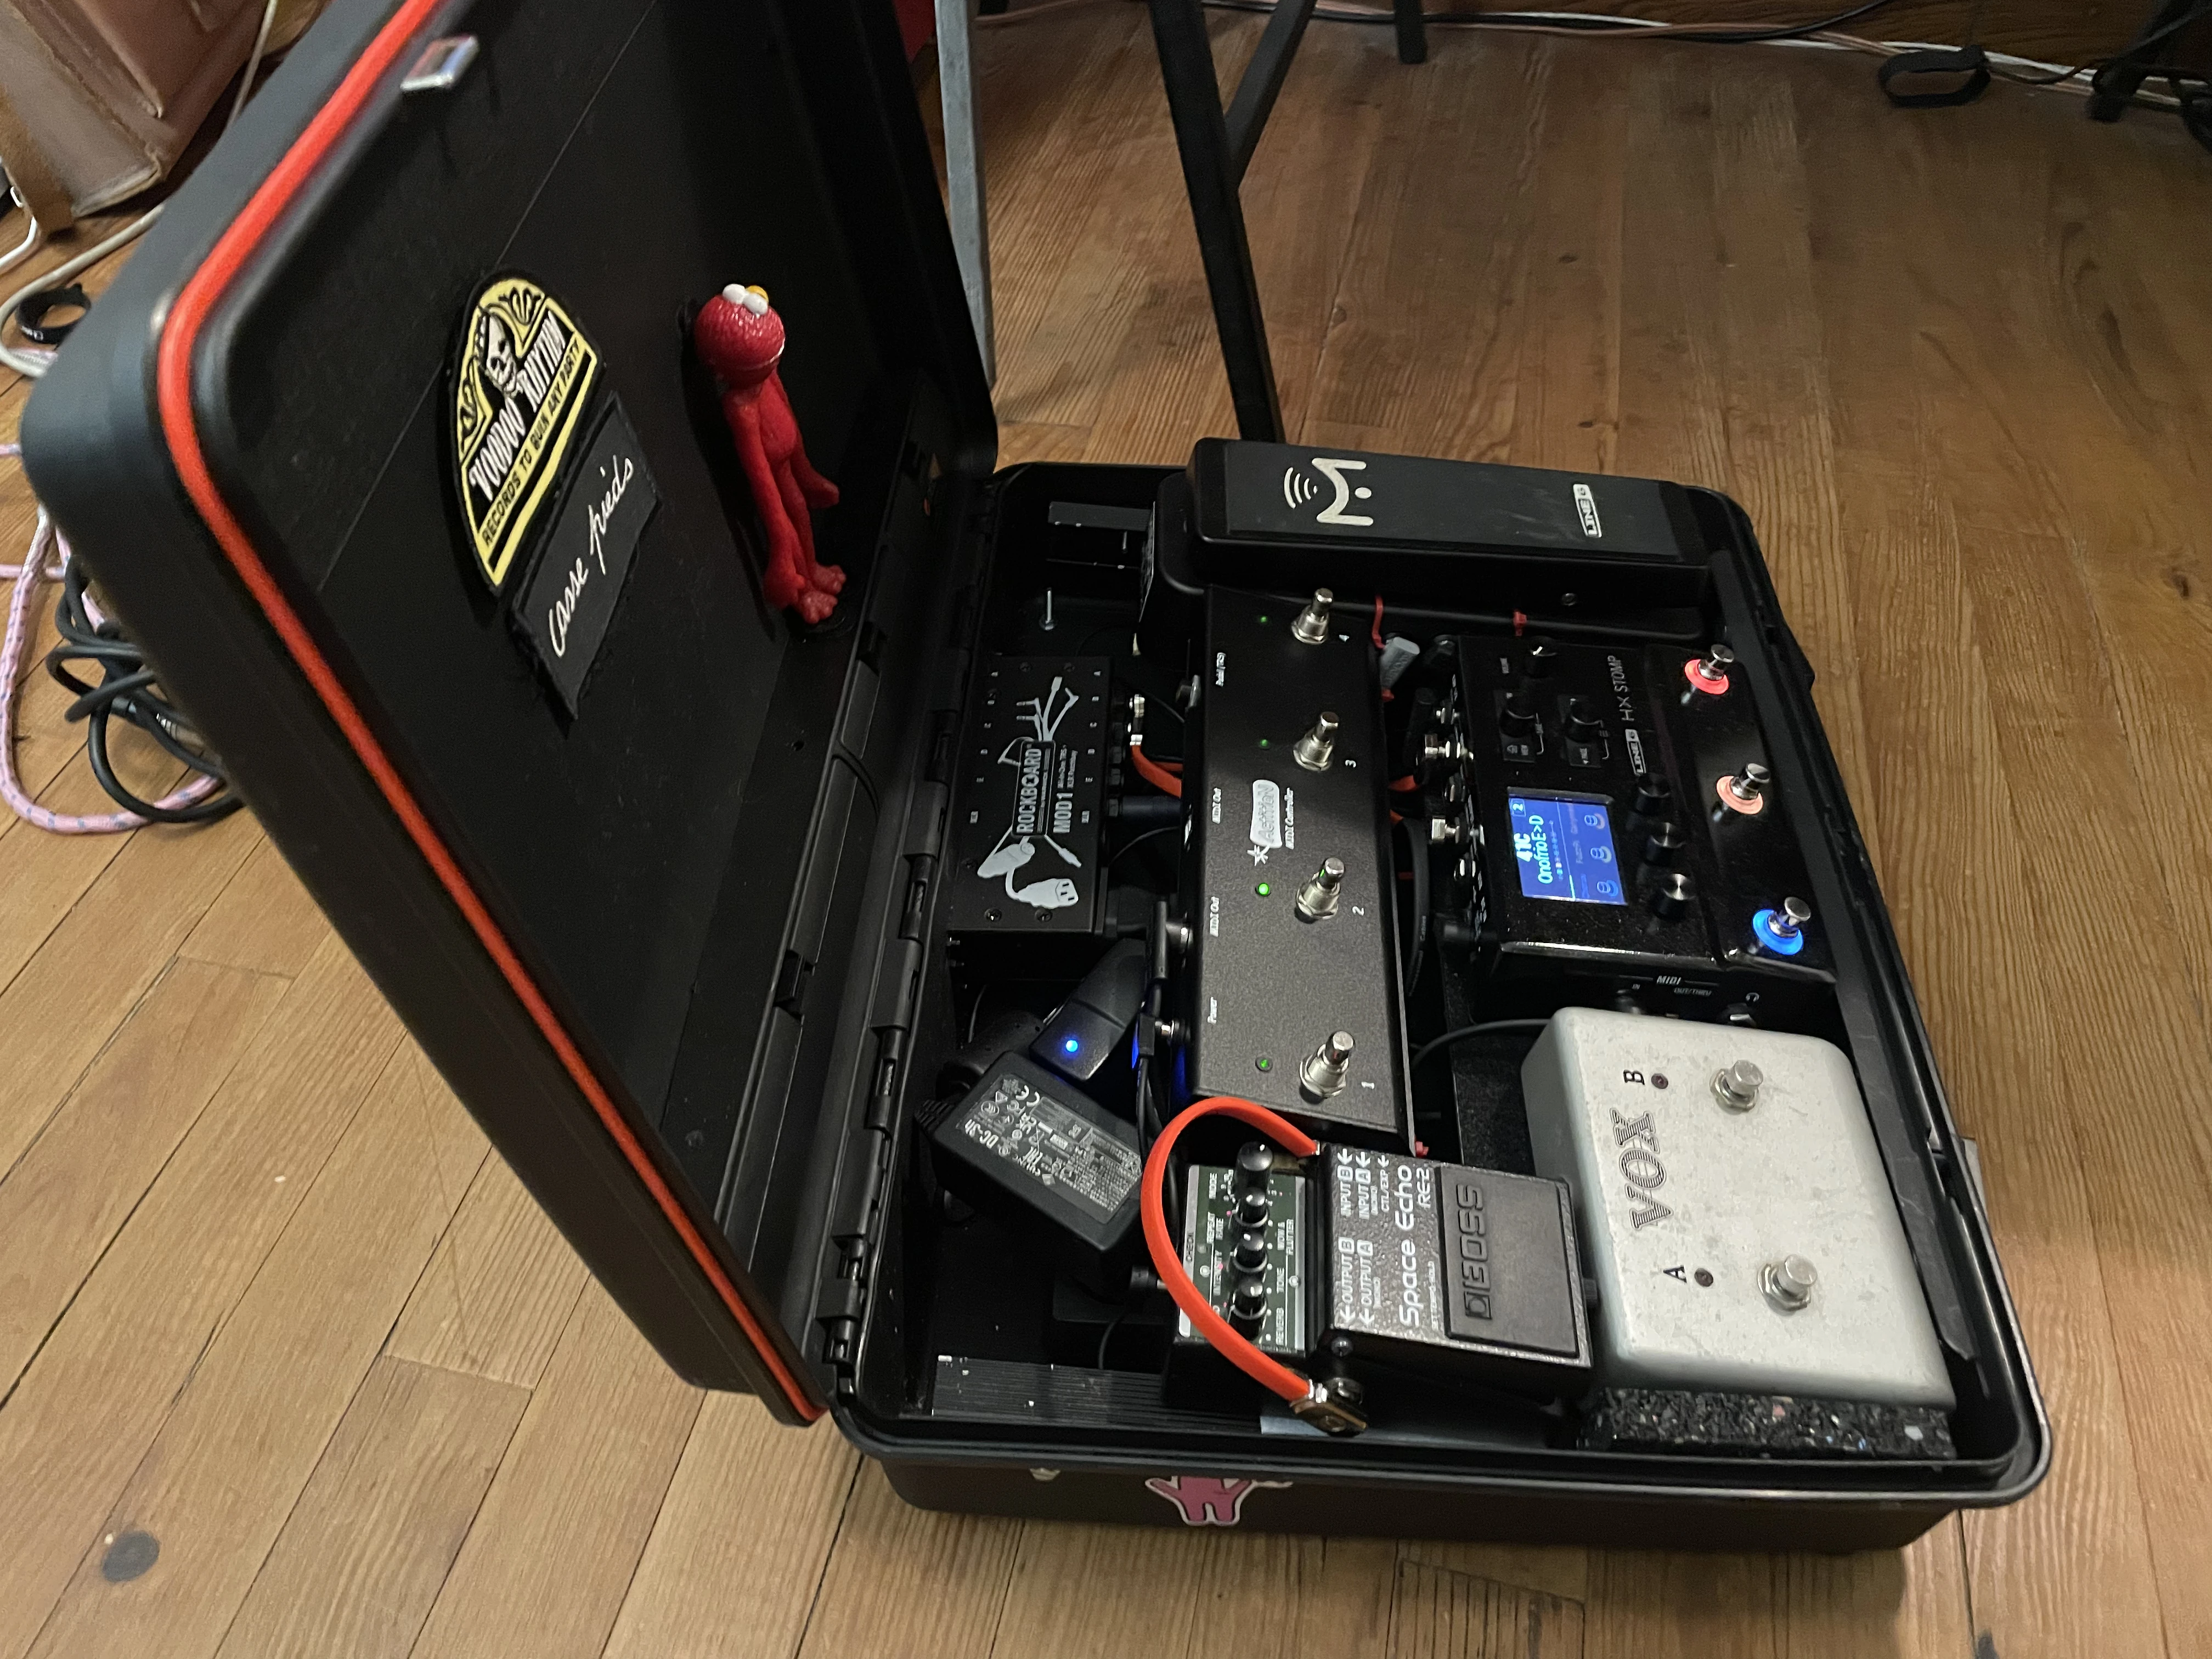
I initially planned to build my own with a mixture of aluminium and wood, but finaly decided to buy a second hand pedalboard and adapt it in the case with a couple of screws. I chose a Palmer 40 cm one and removed the top rail. It came with rubber feet that I removed. I replaced the front ones with 8 millimeters threaded rods that I passed through the case structure bottom, securing them with a nut in a rubber feet. Fancy!
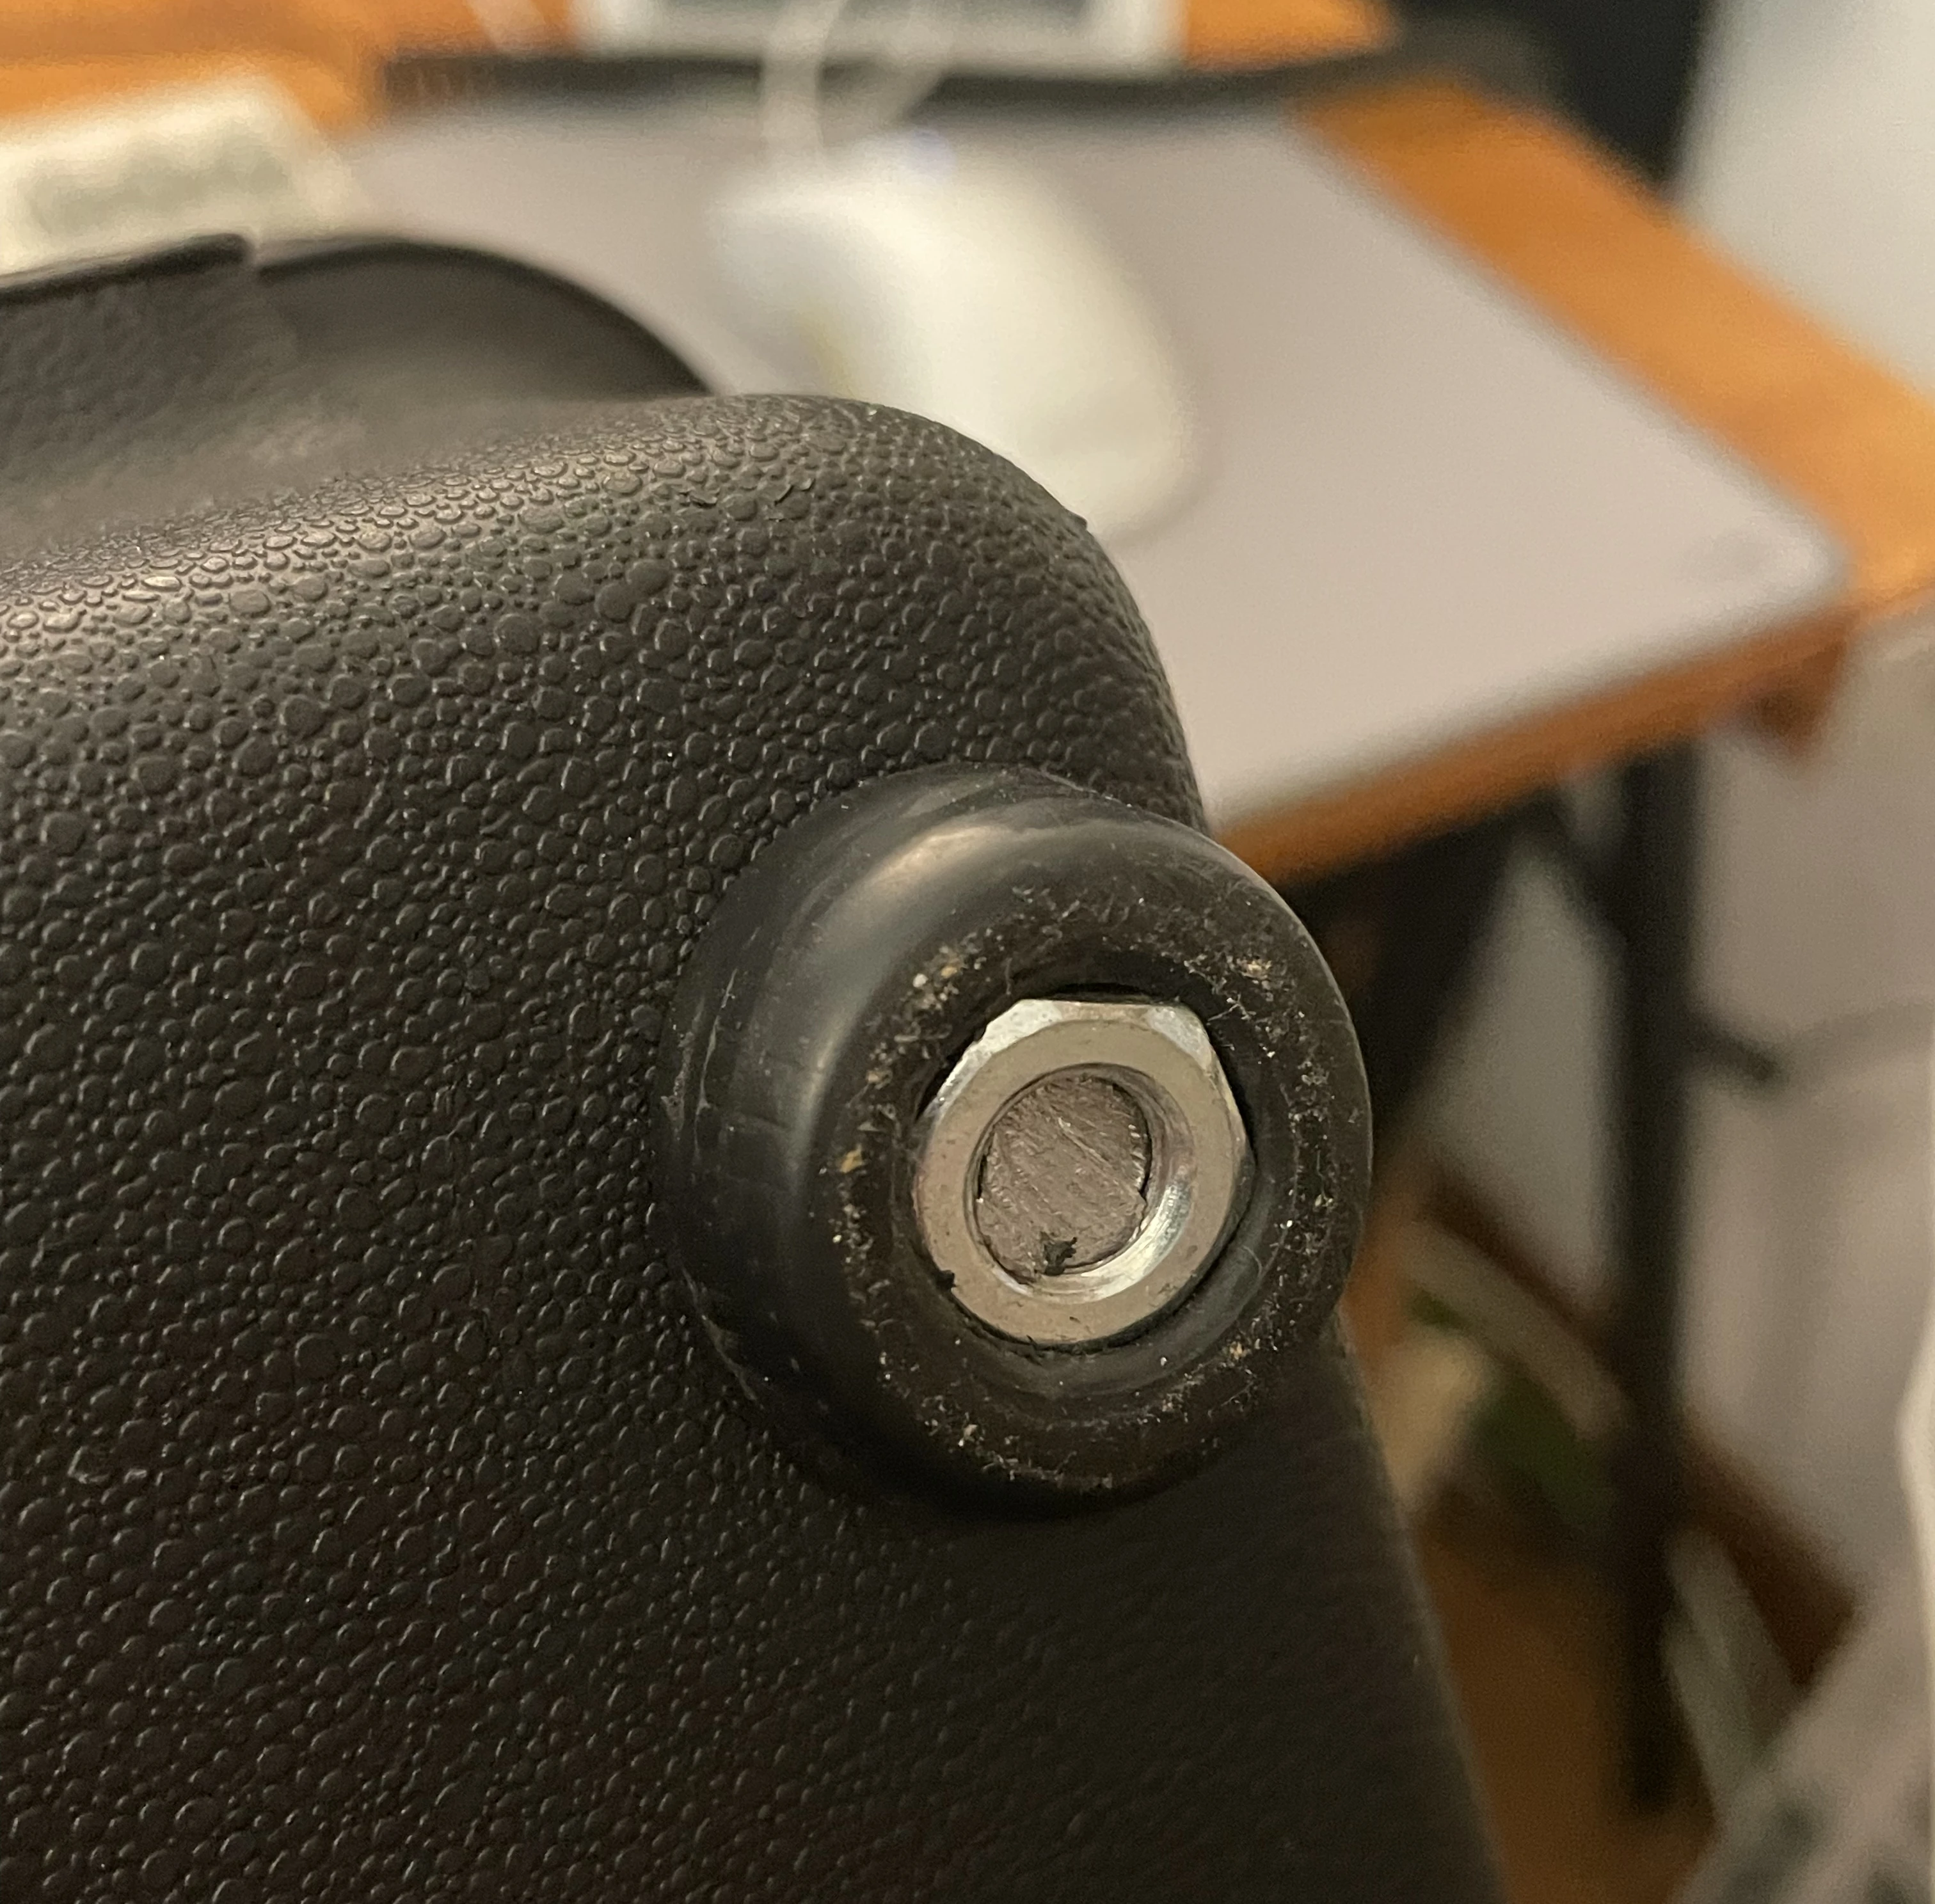
For the back of the pedalboard, I just dug two more holes on the case sides and used a 4 millimeters screw and a nut that goes directly to the board. The result is incredibly solid and the rubber feet brings a lot of stability.

Passing the power strip and adapter under the board structure was a difficult one, because the SP1-L6H expression pedal is huge and it made impossible to close the case in a lot of my tests. I had to adjust the right height before setting the lateral screws.
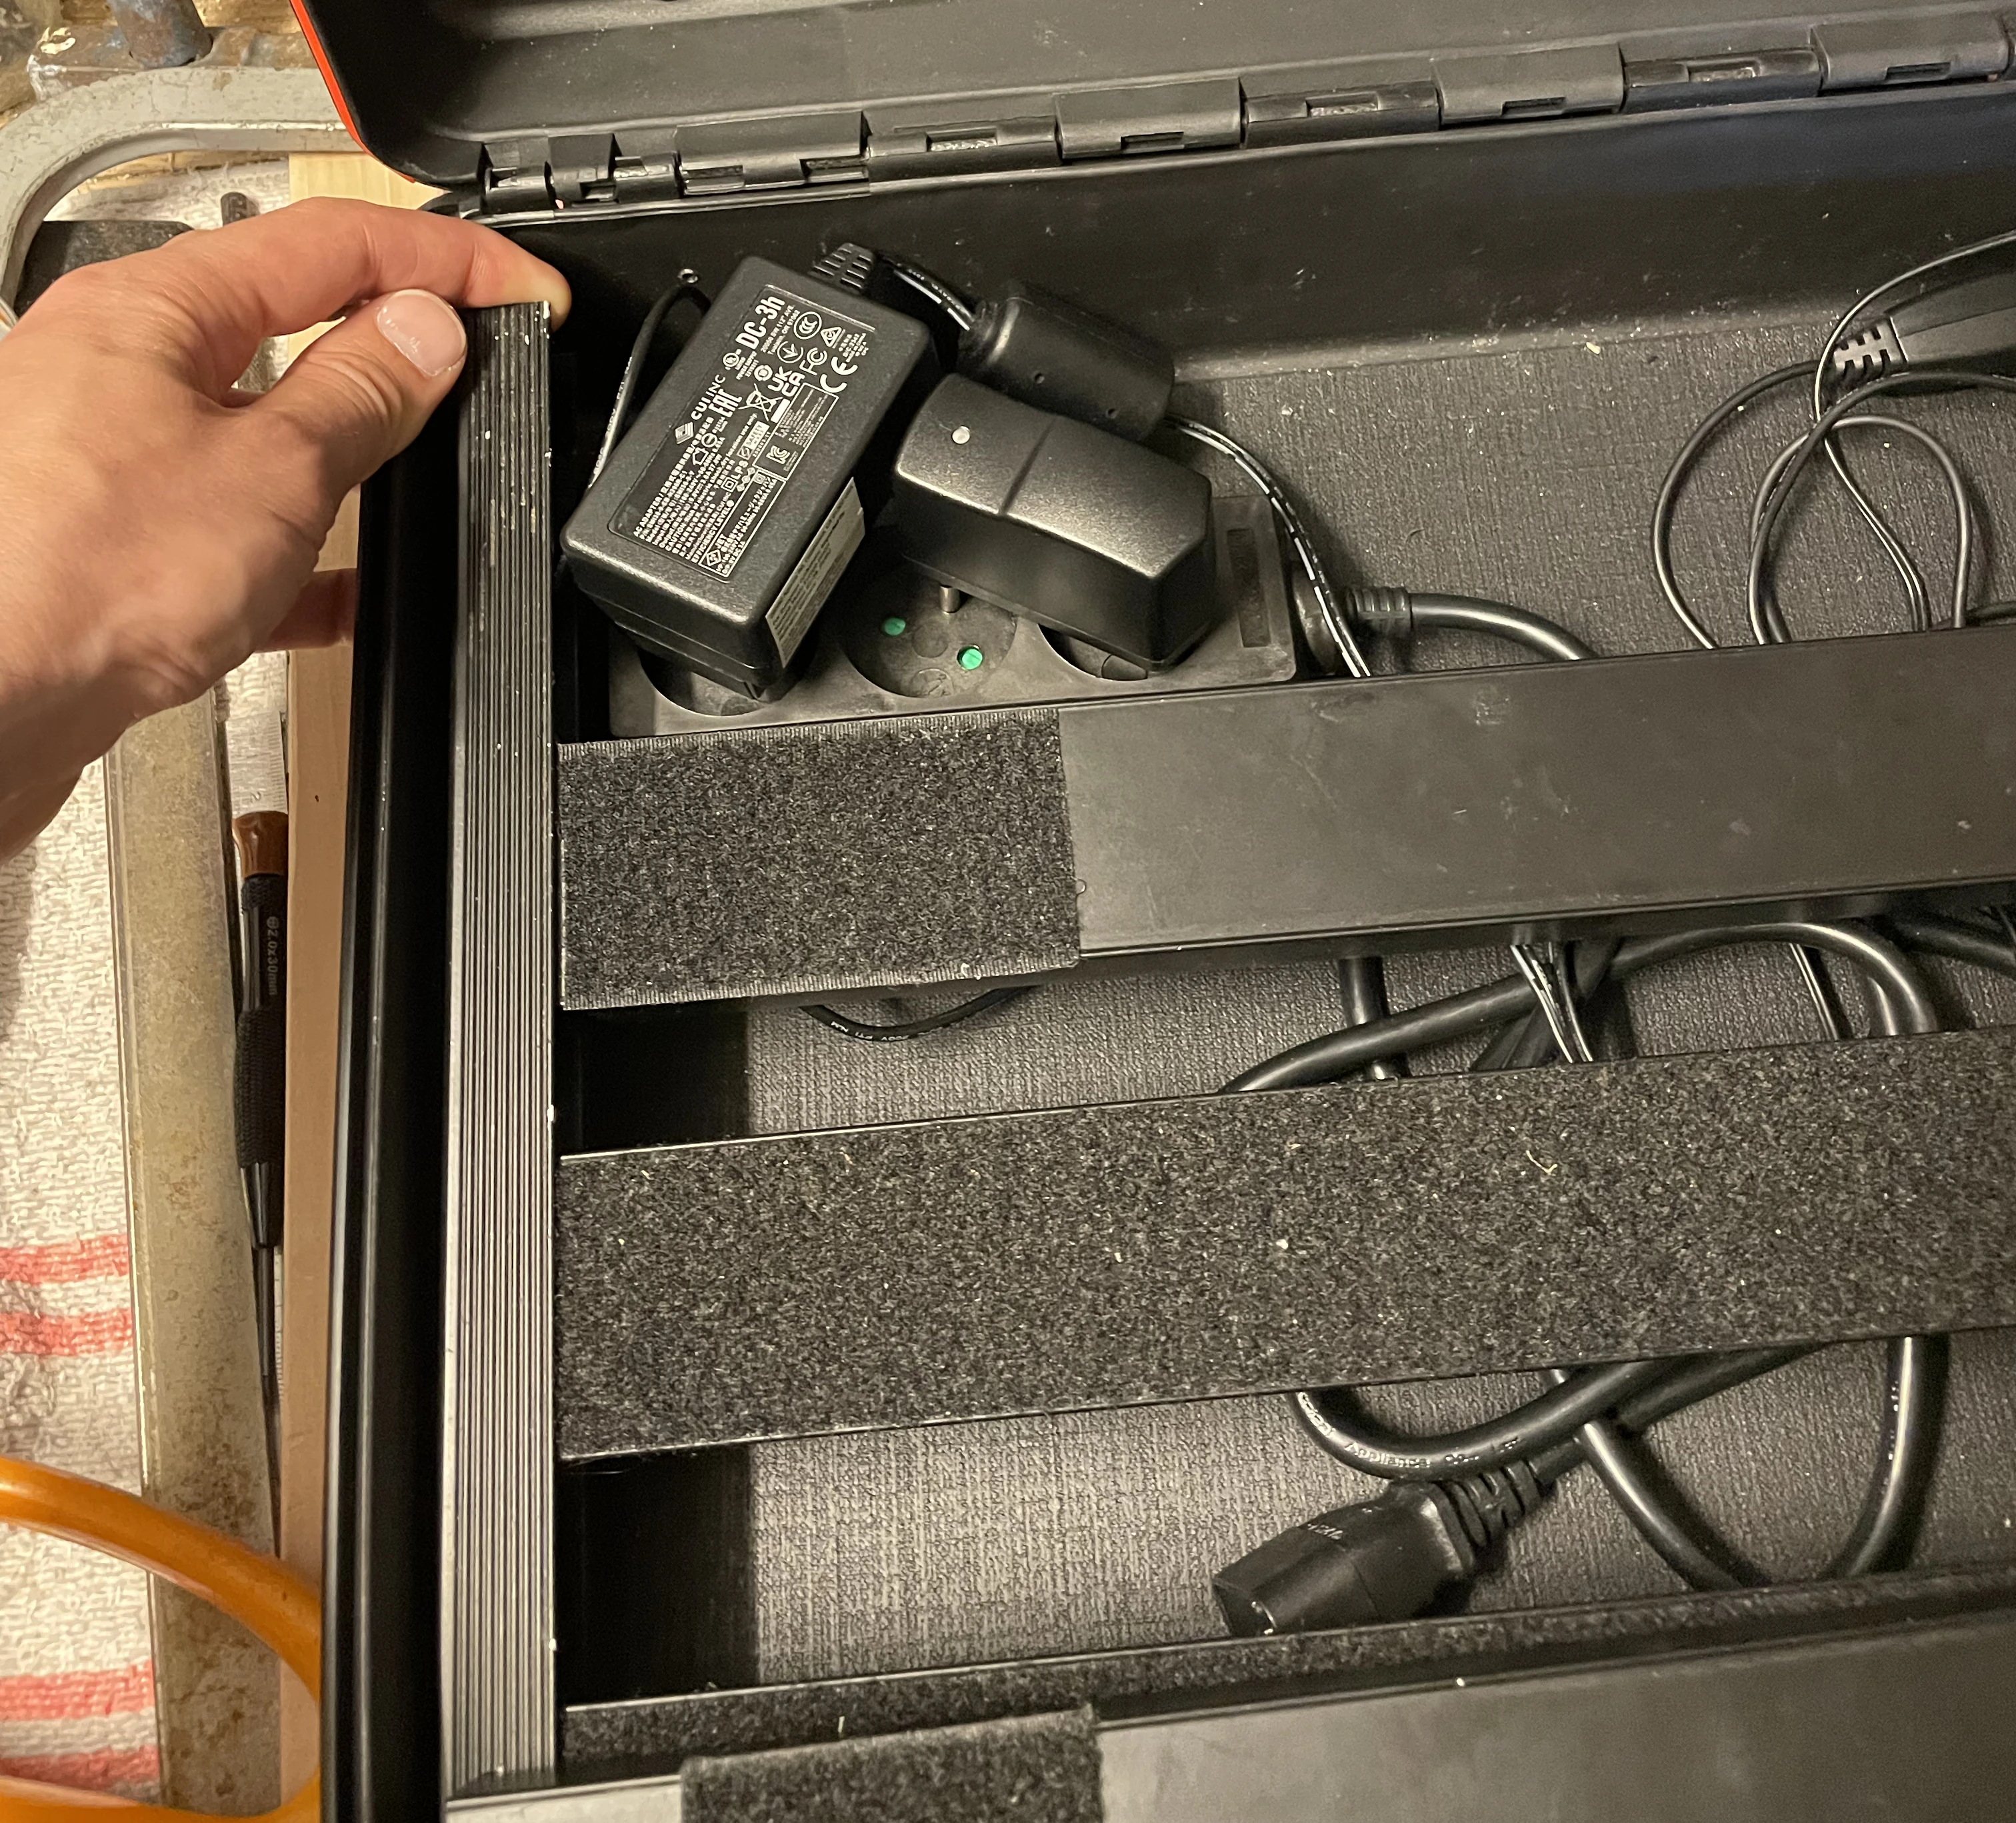
That electrical part is not the nicest, but I refused to spend more money for a real pedal board alimentation, so I just used an UPS cable with multi-socket where I plugged two transformers to provide electricity for the HX Stomp on one side, and to the Boss Space Echo RE2 plus the Actition MIDI controller on the other side.
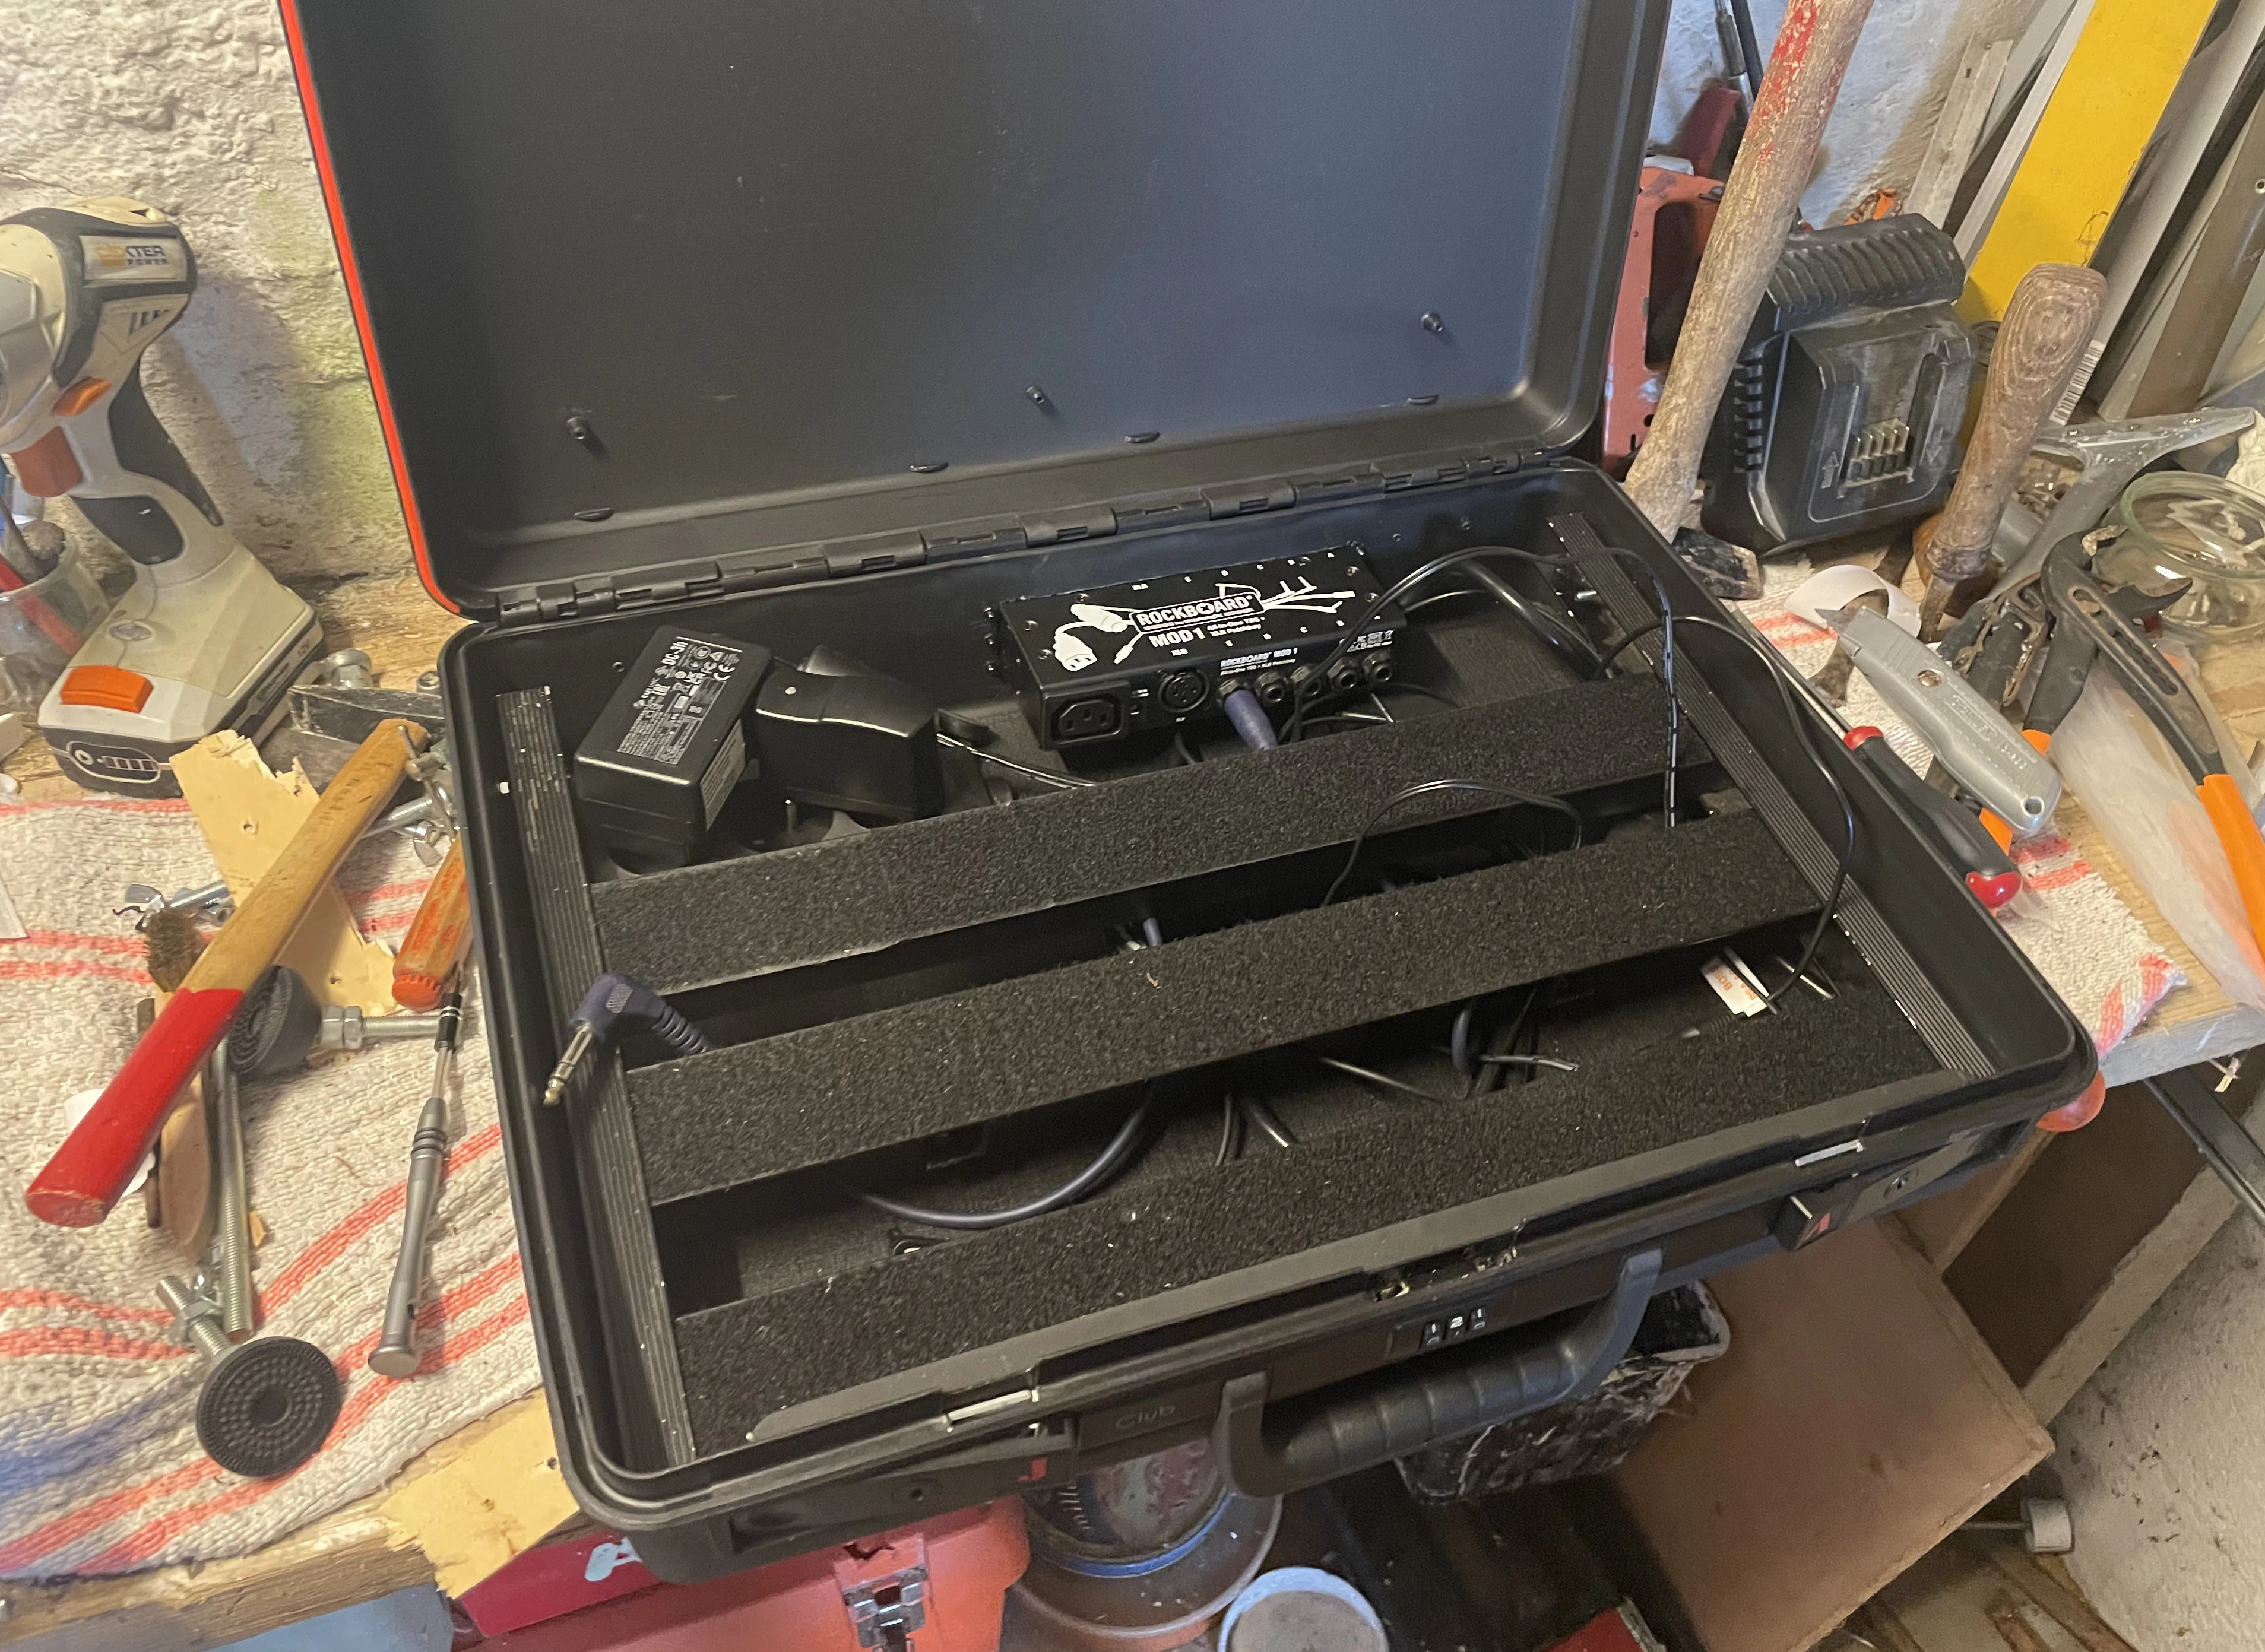
The hardest part was done, really setting the Palmer metal structure into the Delsey case was the most annoying part but it turned out to have work very well.
Plugging and testing#
From that point I reached the plugging and final tests. There were a couple of last minute problems with the patch cables and space between pedals, but it got easily solved.
Most of the pedals got fixed to the metal pedal board structure with velcro bands, and sometimes, I used a couple of cable ties, notably for the heaviest pedal (the SP1-L6H).
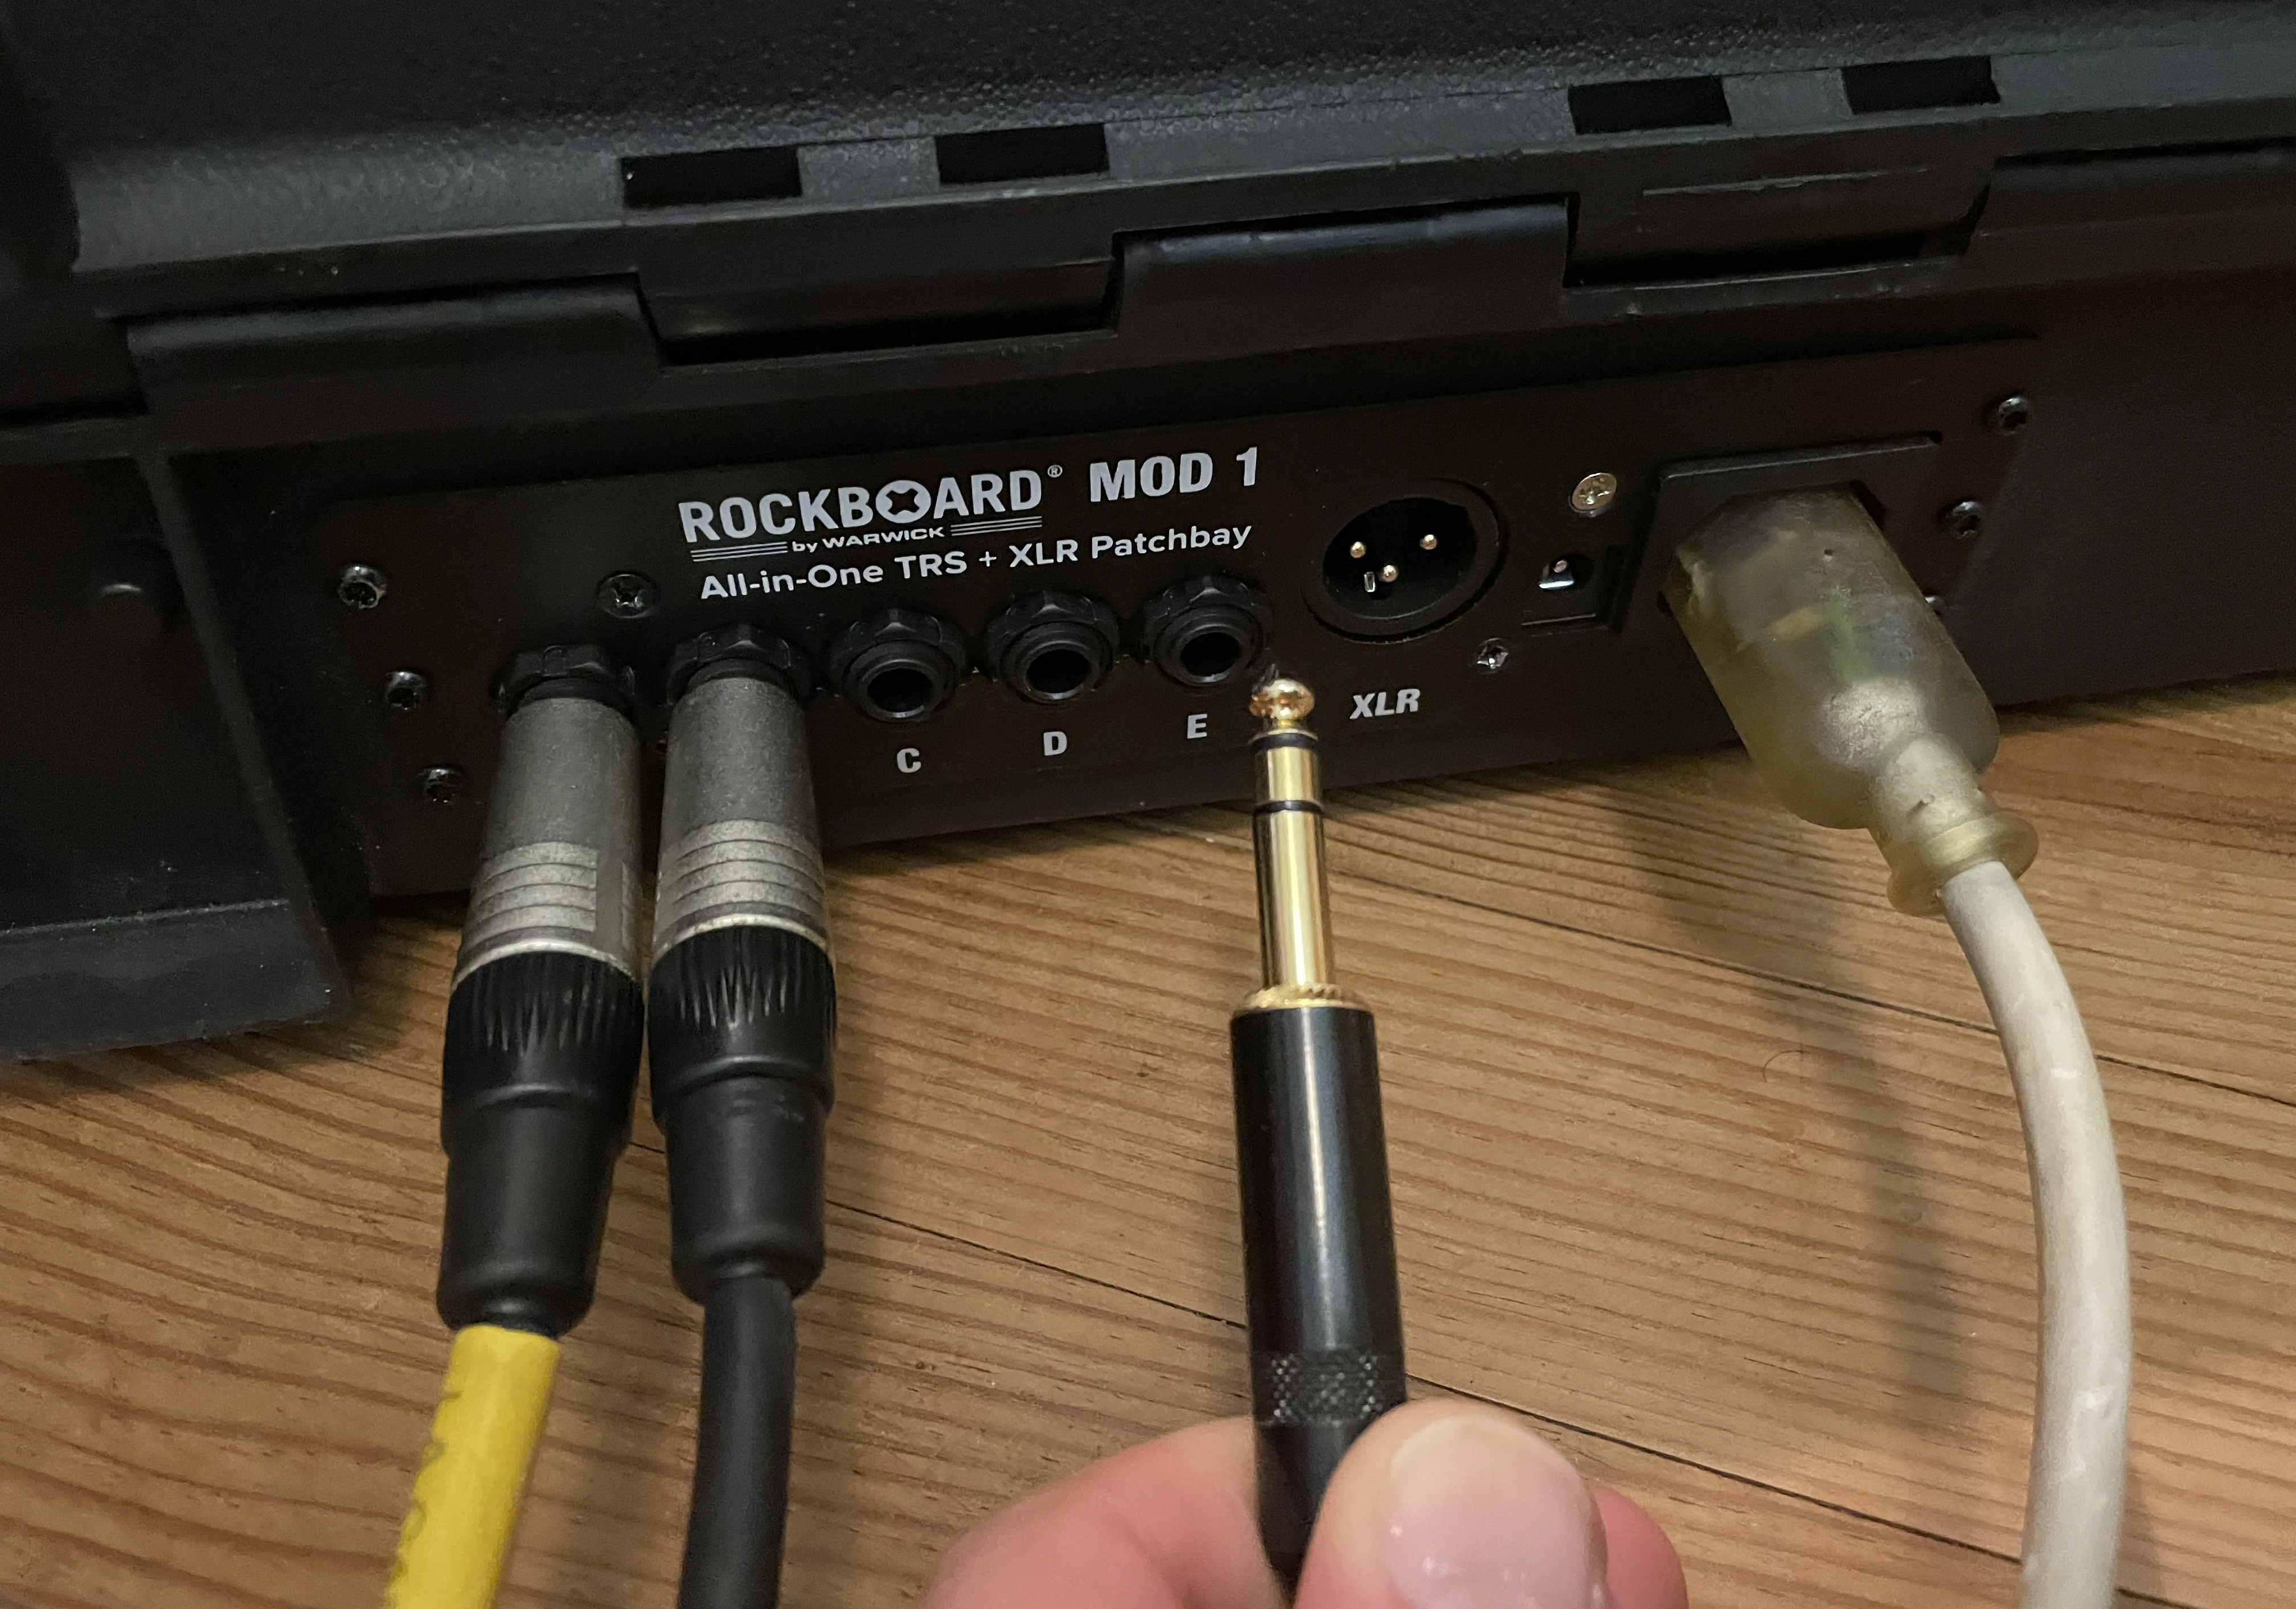
The cable plugging is extremelly satisfactory: socket A is used for guitar-in, socket B is used for amp-out, and socket E is used as an output going from the Vox foot switch to the amp foot switch input (for toggling the amp integrated reverb and tremollo).
Adjusting heights#
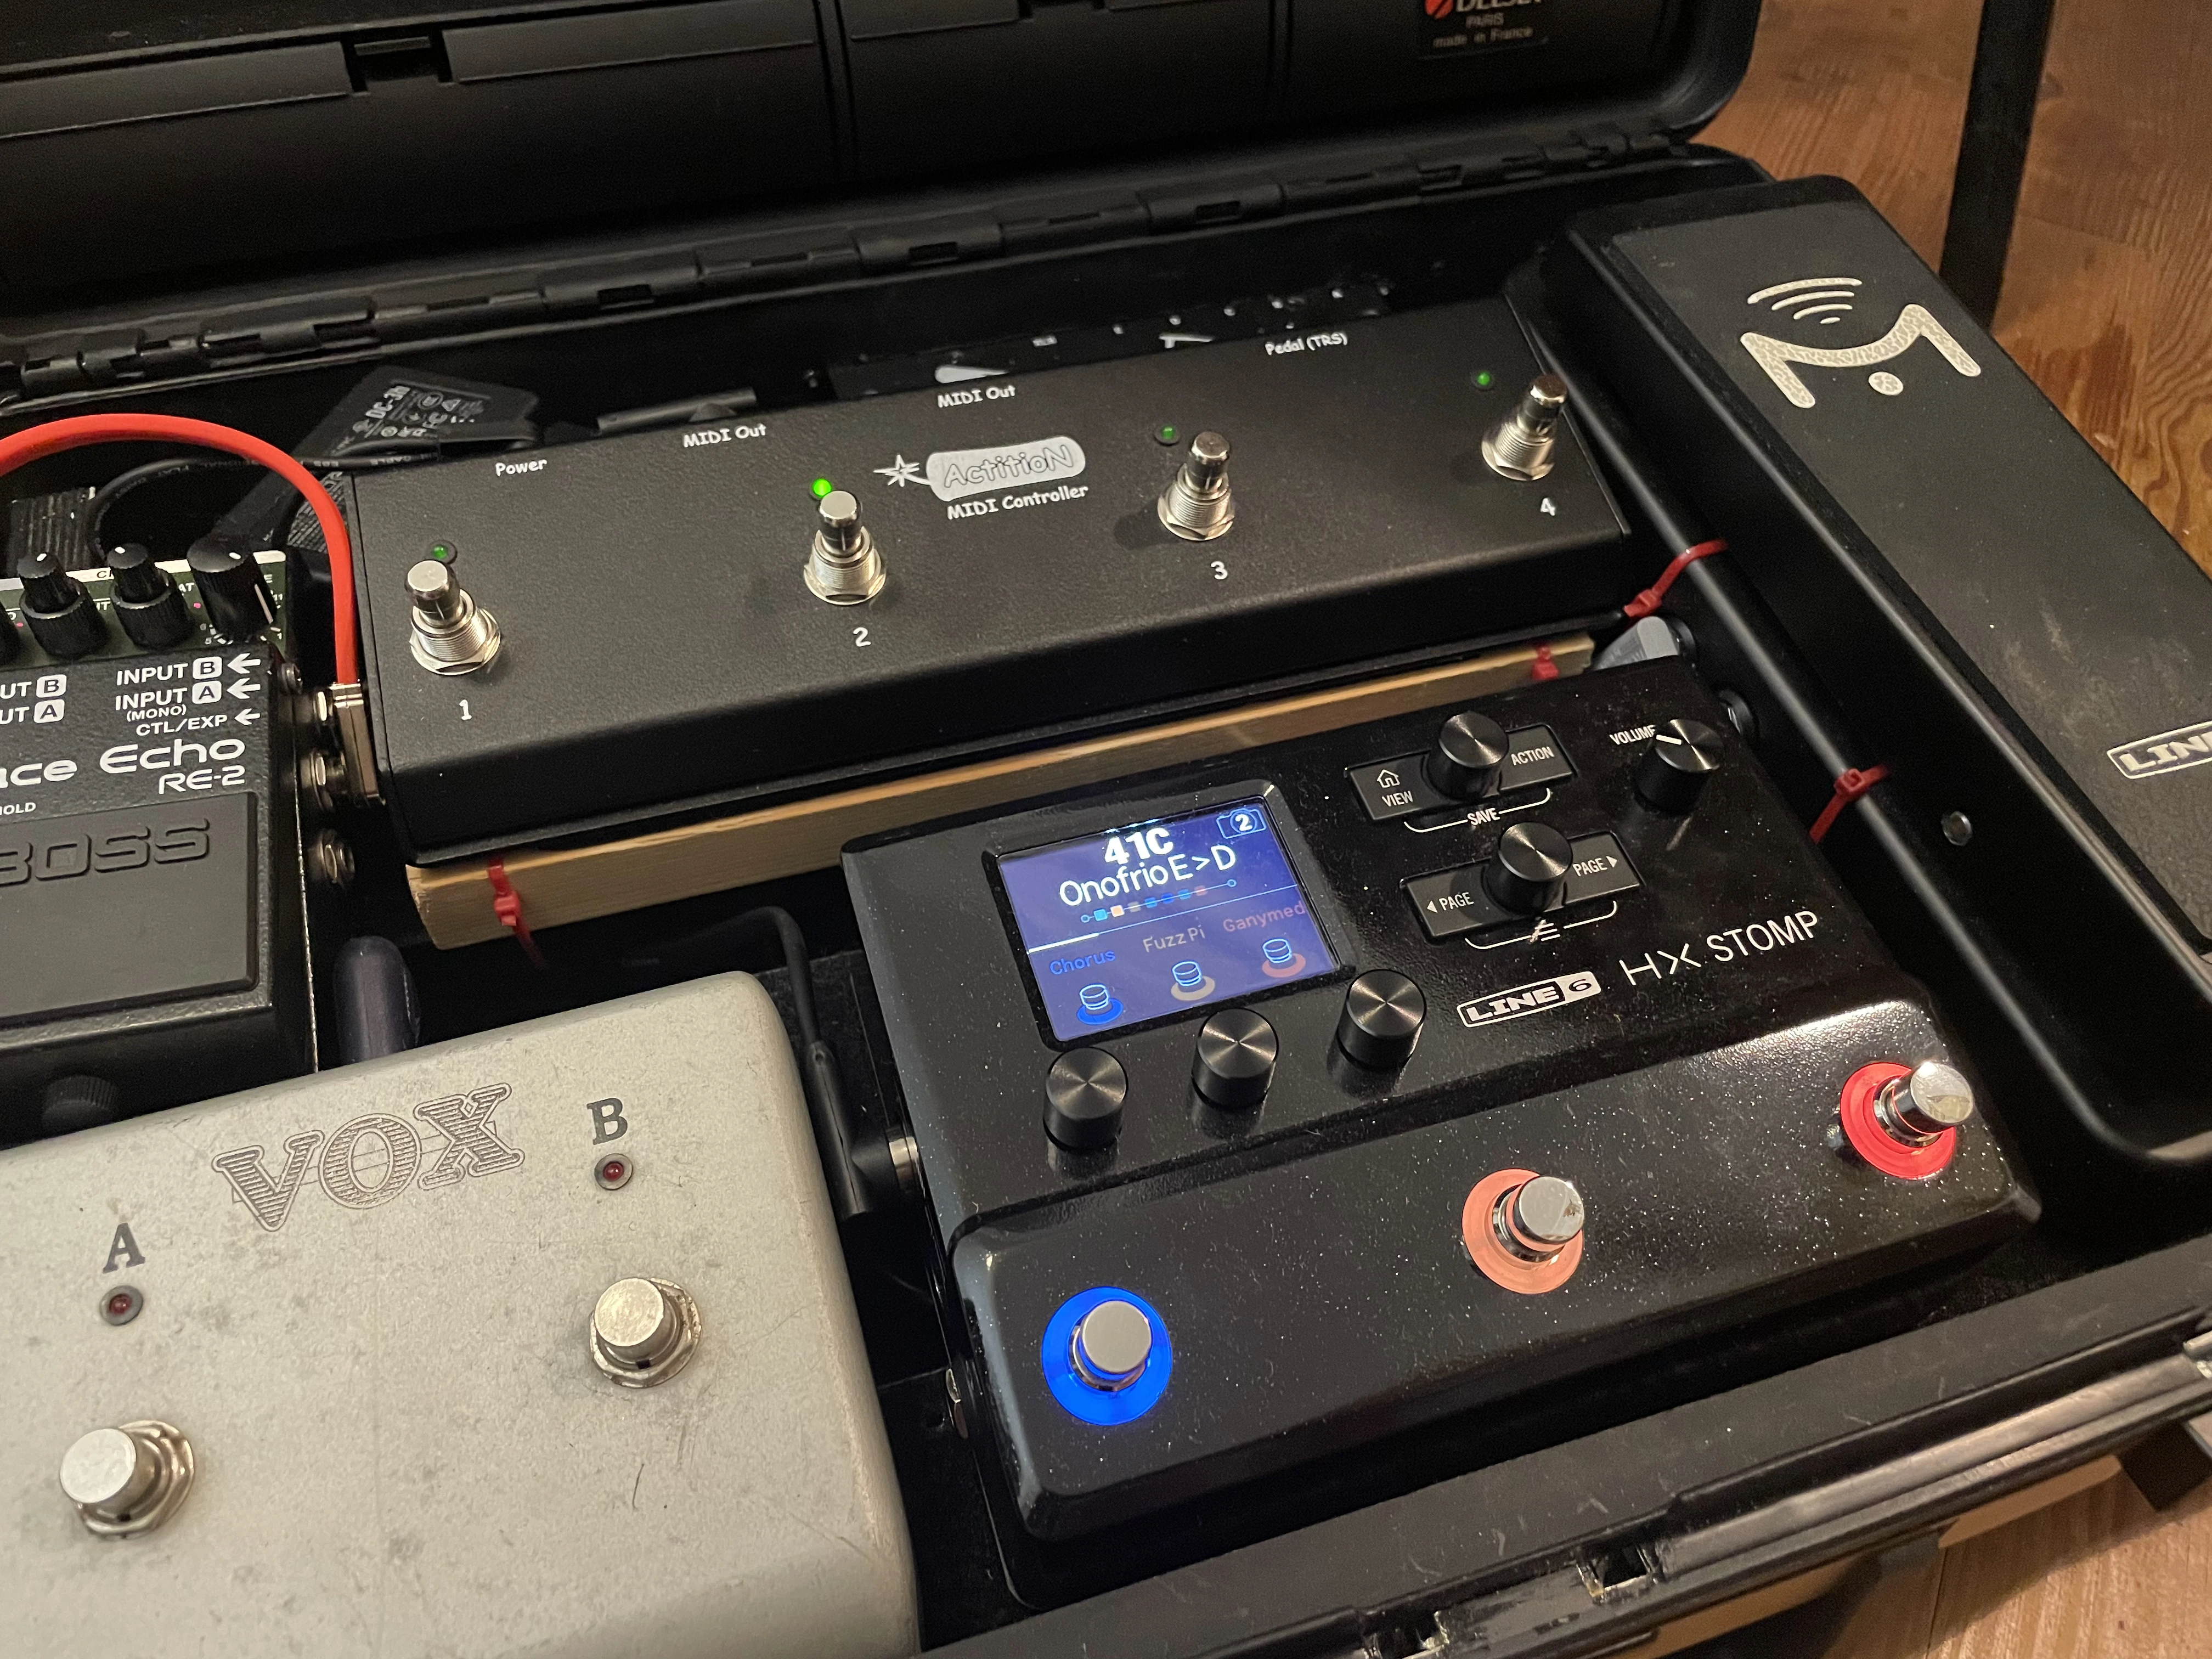
I was obliged to set a huge piece of wood under the MIDI controller to access it’s switches easily over the HX stomp.
Final result#

Feedback#
My partner said I should consider a career change and try to commercialize custom pedal boards services. A musician fellow said it looked « professional », which made me very sceptical as all I wanted to do was having fun in my garage.